

Price Match Guarantee

In-stock parts ship the same day

365-Day Return Policy
Price Match GuaranteeGET PRO PRICING
Video & Articles: Appliance & Equipment RepairWhirlpool/Kenmore Washer Won't Drain? Replace Hose #W10358149

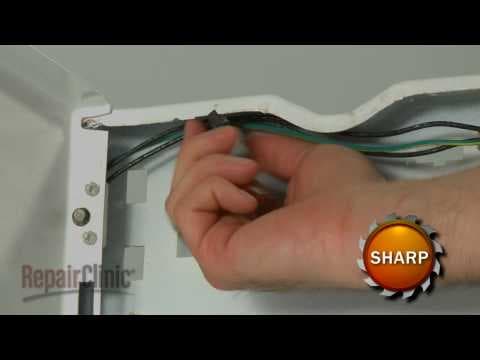
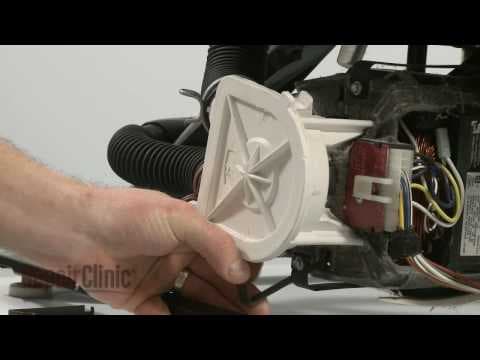
Whirlpool/Kenmore Washer Won't Drain? Replace Hose #W10358149
Skill Level
Total Parts Cost
$30.53Estimated Savings
$112.5003:24
- Description
This video provides step-by-step repair instructions for replacing the drain hose (pump to back panel) on a Whirlpool/Kenmore top-loading washing machine. The most common reasons for replacing the drain hose are when the washer is leaking or not draining.
All of the information for this drain hose replacement video is applicable to the following brands:
Whirlpool, Kenmore, Roper, Inglis, Estate, Crosley
Tools needed: flathead screwdriver, Phillips head screwdriver, pliers, putty knife
All of the information for this drain hose replacement video is applicable to the following brands:
Whirlpool, Kenmore, Roper, Inglis, Estate, Crosley
Tools needed: flathead screwdriver, Phillips head screwdriver, pliers, putty knife
Step By Step Instructions
1
As with any repair, be sure you’ve unplugged the appliance before beginning.
2
Your first step is to move the control panel out of the way.
3
To do this, remove the screws found at either end.
4
On some models these screws may be located in the rear panel or they may be covered by plastic end caps.
5
Pull the end cap off from the top to access the screw.
6
Remove both screws and rotate the panel up.
7
Some models use clips instead of screws to secure the control panel.
8
Insert a putty knife between the control panel and the cabinet to release the clips.
9
Now, unplug the wire connector and snap out the spring clips using a flathead screwdriver.
10
Tilt the cabinet toward you, slide forward and remove.
11
You’re now ready to remove the old drain hose connecting the pump to the back panel.
12
Using pliers, release the clamp that secures the hose to the pump and pull the hose off.
13
Be prepared for water to spill out.
14
Next, remove the external drain hose from the back panel.
15
Again, be prepared for some water to spill.
16
Now, release the plastic back panel port by pressing down the tab at the top and pull the old drain hose assembly out.
17
Prepare the new drain hose assembly for installation by sliding the new clamp onto the hose.
18
Now, feed the new hose through the back panel.
19
Align the bottom of the plastic port with the slot in the panel and snap the top portion into place.
20
Snap the support clip into the base leg and slide the hose onto the outlet port of the pump.
21
Secure it by tightening the clamp and locking it in place with a flathead screwdriver.
22
Reattach the external drain hose to the new back panel port.
23
Next, reinstall the cabinet.
24
The front edge of the cabinet slides underneath the base frame.
25
Use your foot to push it into position.
26
Align the two notches in each side of the cabinet with the tabs on each side of the base frame.
27
Now ease the cabinet to match up with the rear panel.
28
Reinstall the spring clips.
29
Reattach the wire connector.
30
Rotate the control panel down and lock the clips into place or reinstall the two screws.
31
If applicable to your model, replace the end caps by aligning the tab with the slot at the bottom and snapping the cap into position.
32
You’re now ready to plug the appliance back in to make sure it’s functioning properly.
Description
This video provides step-by-step repair instructions for replacing the drain hose (pump to back panel) on a Whirlpool/Kenmore top-loading washing machine. The most common reasons for replacing the drain hose are when the washer is leaking or not draining.
All of the information for this drain hose replacement video is applicable to the following brands:
Whirlpool, Kenmore, Roper, Inglis, Estate, Crosley
Tools needed: flathead screwdriver, Phillips head screwdriver, pliers, putty knife
All of the information for this drain hose replacement video is applicable to the following brands:
Whirlpool, Kenmore, Roper, Inglis, Estate, Crosley
Tools needed: flathead screwdriver, Phillips head screwdriver, pliers, putty knife
Step-By-Step Instructions
1
As with any repair, be sure you’ve unplugged the appliance before beginning.
2
Your first step is to move the control panel out of the way.
3
To do this, remove the screws found at either end.
4
On some models these screws may be located in the rear panel or they may be covered by plastic end caps.
5
Pull the end cap off from the top to access the screw.
6
Remove both screws and rotate the panel up.
7
Some models use clips instead of screws to secure the control panel.
8
Insert a putty knife between the control panel and the cabinet to release the clips.
9
Now, unplug the wire connector and snap out the spring clips using a flathead screwdriver.
10
Tilt the cabinet toward you, slide forward and remove.
11
You’re now ready to remove the old drain hose connecting the pump to the back panel.
12
Using pliers, release the clamp that secures the hose to the pump and pull the hose off.
13
Be prepared for water to spill out.
14
Next, remove the external drain hose from the back panel.
15
Again, be prepared for some water to spill.
16
Now, release the plastic back panel port by pressing down the tab at the top and pull the old drain hose assembly out.
17
Prepare the new drain hose assembly for installation by sliding the new clamp onto the hose.
18
Now, feed the new hose through the back panel.
19
Align the bottom of the plastic port with the slot in the panel and snap the top portion into place.
20
Snap the support clip into the base leg and slide the hose onto the outlet port of the pump.
21
Secure it by tightening the clamp and locking it in place with a flathead screwdriver.
22
Reattach the external drain hose to the new back panel port.
23
Next, reinstall the cabinet.
24
The front edge of the cabinet slides underneath the base frame.
25
Use your foot to push it into position.
26
Align the two notches in each side of the cabinet with the tabs on each side of the base frame.
27
Now ease the cabinet to match up with the rear panel.
28
Reinstall the spring clips.
29
Reattach the wire connector.
30
Rotate the control panel down and lock the clips into place or reinstall the two screws.
31
If applicable to your model, replace the end caps by aligning the tab with the slot at the bottom and snapping the cap into position.
32
You’re now ready to plug the appliance back in to make sure it’s functioning properly.
Applicable Product Model
Related Articles & Videos
04:10
Part Replacement
Washer Won't Spin? Replace Whirlpool Direct Drive Clutch Assembly Part # 285785




Our Story
Family-owned and operated since 1912, Burke America Parts Group is the longest-running genuine appliance, HVAC, and outdoor power equipment parts solution in North America. At Repair Clinic, we're proud to be an international brand trusted by the pros as well as the DIY community.
About Repair Clinic
© 2026 RepairClinic.com