

Price Match Guarantee

In-stock parts ship the same day

365-Day Return Policy
Price Match GuaranteeGET PRO PRICING
Video & Articles: Appliance & Equipment RepairBriggs & Stratton Lawn Mower Engine Replace Muffler #790828

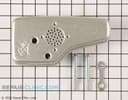
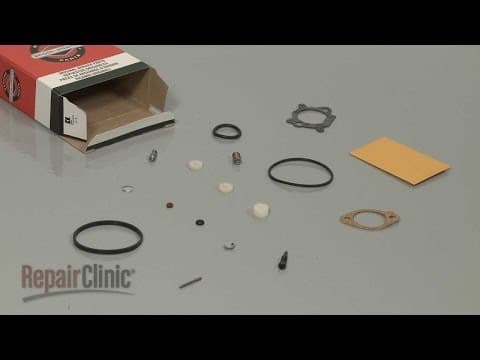
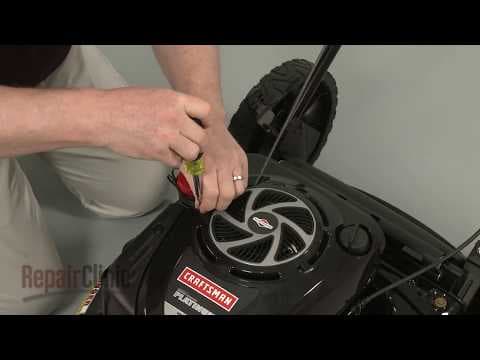
Briggs & Stratton Lawn Mower Engine Replace Muffler #790828
Skill Level
Total Parts Cost
$39.70Estimated Savings
$112.5005:30
- Description
This video provides step-by-step repair instructions for replacing the muffler on a Briggs and Stratton small engine. The most common reason for replacing the muffler is when the engine is unusually loud.
All of the information for this muffler replacement video is applicable to the following brands:
Briggs & Stratton, Toro, John Deere, Lawn Boy
Tools needed: flat-head screwdriver, hammer, 7/16th inch socket, Phillip-head screwdriver, 5/16th inch socket or nut driver, 3/8th inch socket or nut driver, pliers
All of the information for this muffler replacement video is applicable to the following brands:
Briggs & Stratton, Toro, John Deere, Lawn Boy
Tools needed: flat-head screwdriver, hammer, 7/16th inch socket, Phillip-head screwdriver, 5/16th inch socket or nut driver, 3/8th inch socket or nut driver, pliers
Step By Step Instructions
1
Before you replace the muffler on your engine first make sure the engine and muffler have cooled.
2
Next, you should remove the wire and boot from the spark plug to prevent the engine from accidentally starting.
3
We recommend performing this procedure with little or no fuel in the tank.
4
Use a flat-head screwdriver and hammer to bend the muffler mounting bolt locking tabs out of the way.
5
Now use a 7/16th inch socket to loosen and unthread the bolts.
6
Pull the old muffler free of the cylinder.
7
Prepare the new muffler for installation by first aligning the locking tab plate and inserting the provided mounting bolts.
8
Now align the old gaskets and heat shield on the new muffler.
9
If the choke thermostat has become detached, position it on the new muffler along with the gasket.
10
To allow proper alignment of the choke thermostat arm, we recommend removing the blower housing.
11
To do this, use a phillips-head screwdriver to unthread the mounting screws securing the engine cover.
12
Next, release the starter rope from the retainer.
13
Pull the cover off.
14
Now use a 5/16th inch socket or nut driver to remove the screws securing the fuel tank.
15
Use a 3/8th inch socket to remove the mounting bolt securing the tank to the side of the engine block.
16
Set the tank aside.
17
You can now remove the 3/8th inch bolts securing the blower housing.
18
Pull off the blower housing and oil dipstick tube.
19
Now apply some anti-seize to the threads of the muffler mounting bolts.
20
Position the new muffler assembly on the cylinder, making sure the choke thermostat arm is inside the air vane hook.
21
Thread the mounting bolts and torque them to seven-and-a-half foot pounds.
22
Bend the locking tabs in to prevent the bolts from unthreading.
23
Be aware that the thermostat arm needs to be aligned between the markings on both the front and side of the air vane hook.
24
Replace the blower housing making sure the attached dipstick tube is inserted into the sump.
25
Thread the mounting bolts to secure and torque them to seven-and-a-half foot pounds.
26
Confirm that the spacer is in place on the fuel tank then reposition the tank on the blower housing.
27
Replace the bolt and mounting screws to secure.
28
Realign the engine cover.
29
Rethread and tighten the mounting screws.
30
Depress the bail arm, extend the starter rope and secure it in the retainer.
31
With the repair completed reattach the wire and boot to the spark plug refill the fuel tank and your engine should be ready for use.
Description
This video provides step-by-step repair instructions for replacing the muffler on a Briggs and Stratton small engine. The most common reason for replacing the muffler is when the engine is unusually loud.
All of the information for this muffler replacement video is applicable to the following brands:
Briggs & Stratton, Toro, John Deere, Lawn Boy
Tools needed: flat-head screwdriver, hammer, 7/16th inch socket, Phillip-head screwdriver, 5/16th inch socket or nut driver, 3/8th inch socket or nut driver, pliers
All of the information for this muffler replacement video is applicable to the following brands:
Briggs & Stratton, Toro, John Deere, Lawn Boy
Tools needed: flat-head screwdriver, hammer, 7/16th inch socket, Phillip-head screwdriver, 5/16th inch socket or nut driver, 3/8th inch socket or nut driver, pliers
Step-By-Step Instructions
1
Before you replace the muffler on your engine first make sure the engine and muffler have cooled.
2
Next, you should remove the wire and boot from the spark plug to prevent the engine from accidentally starting.
3
We recommend performing this procedure with little or no fuel in the tank.
4
Use a flat-head screwdriver and hammer to bend the muffler mounting bolt locking tabs out of the way.
5
Now use a 7/16th inch socket to loosen and unthread the bolts.
6
Pull the old muffler free of the cylinder.
7
Prepare the new muffler for installation by first aligning the locking tab plate and inserting the provided mounting bolts.
8
Now align the old gaskets and heat shield on the new muffler.
9
If the choke thermostat has become detached, position it on the new muffler along with the gasket.
10
To allow proper alignment of the choke thermostat arm, we recommend removing the blower housing.
11
To do this, use a phillips-head screwdriver to unthread the mounting screws securing the engine cover.
12
Next, release the starter rope from the retainer.
13
Pull the cover off.
14
Now use a 5/16th inch socket or nut driver to remove the screws securing the fuel tank.
15
Use a 3/8th inch socket to remove the mounting bolt securing the tank to the side of the engine block.
16
Set the tank aside.
17
You can now remove the 3/8th inch bolts securing the blower housing.
18
Pull off the blower housing and oil dipstick tube.
19
Now apply some anti-seize to the threads of the muffler mounting bolts.
20
Position the new muffler assembly on the cylinder, making sure the choke thermostat arm is inside the air vane hook.
21
Thread the mounting bolts and torque them to seven-and-a-half foot pounds.
22
Bend the locking tabs in to prevent the bolts from unthreading.
23
Be aware that the thermostat arm needs to be aligned between the markings on both the front and side of the air vane hook.
24
Replace the blower housing making sure the attached dipstick tube is inserted into the sump.
25
Thread the mounting bolts to secure and torque them to seven-and-a-half foot pounds.
26
Confirm that the spacer is in place on the fuel tank then reposition the tank on the blower housing.
27
Replace the bolt and mounting screws to secure.
28
Realign the engine cover.
29
Rethread and tighten the mounting screws.
30
Depress the bail arm, extend the starter rope and secure it in the retainer.
31
With the repair completed reattach the wire and boot to the spark plug refill the fuel tank and your engine should be ready for use.
Applicable Product Model
Parts Needed
Muffler
$39.70

Total$0.00
Related Articles & Videos
03:24
Part Replacement
Briggs & Stratton Mower Small Engine Fuel Filter Installation #791891
08:09
Part Replacement
Briggs & Stratton Lawn Mower Engine Carburetor Rebuild Kit #498260




Our Story
Family-owned and operated since 1912, Burke America Parts Group is the longest-running genuine appliance, HVAC, and outdoor power equipment parts solution in North America. At Repair Clinic, we're proud to be an international brand trusted by the pros as well as the DIY community.
About Repair Clinic
© 2026 RepairClinic.com