

Price Match Guarantee

In-stock parts ship the same day

365-Day Return Policy
Price Match GuaranteeGET PRO PRICING
Video & Articles: Appliance & Equipment RepairWhirlpool/Kenmore Washer Clutch Band Kit Replacement #285790

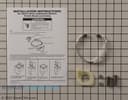
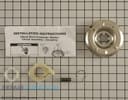

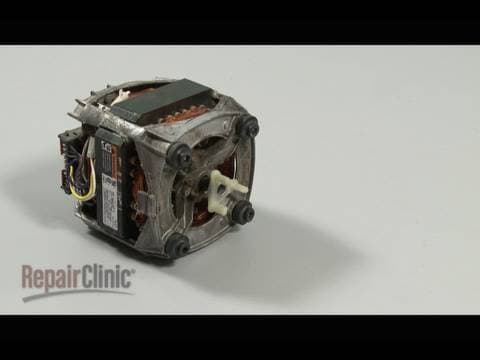
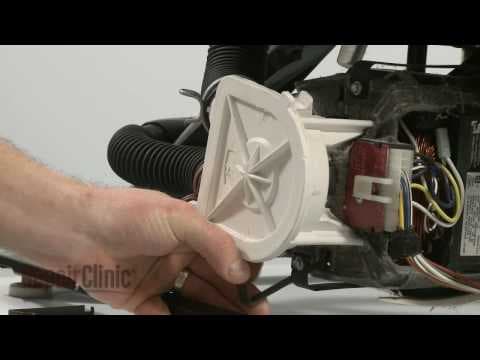
Whirlpool/Kenmore Washer Clutch Band Kit Replacement #285790
Skill Level
Total Parts Cost
$47.40Estimated Savings
$112.5003:55
- Description
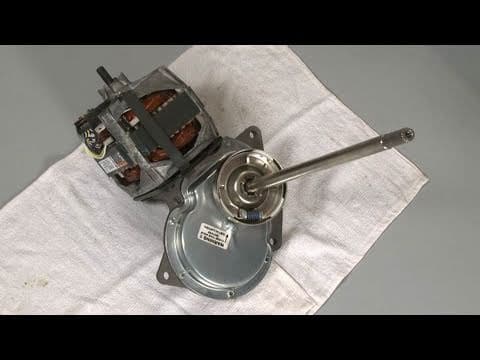
This video provides step-by-step repair instructions for replacing the clutch band and lining kit on a Whirlpool/Kenmore top-loading washing machine. The most common reason for replacing the clutch band kit is when the washer won't spin.
All of the information for this clutch band and lining kit replacement video is applicable to the following brands:
Whirlpool, Kenmore, KitchenAid, Roper, Maytag, Estate, Inglis, Crosley, Amana, Admiral
Tools needed: flathead screwdriver, Phillips head screwdriver, pliers, putty knife. 7/16th socket, hex socket
All of the information for this clutch band and lining kit replacement video is applicable to the following brands:
Whirlpool, Kenmore, KitchenAid, Roper, Maytag, Estate, Inglis, Crosley, Amana, Admiral
Tools needed: flathead screwdriver, Phillips head screwdriver, pliers, putty knife. 7/16th socket, hex socket
Step By Step Instructions
1
Be sure you’ve unplugged the appliance before beginning…
2
… and turn off the hot and cold water supply valves.
3
You will also need to disconnect the two water supply hoses attached to the rear panel…
4
…along with the drain hose.
5
Be prepared for some water to spill out.
6
Next, you will need to remove the agitator.
7
If your model has a rinse dispenser, pull the lock ring up with your fingers and twist the dispenser upwards to remove.
8
Next, remove the agitator cap.
9
Depending on your model, you may also need to remove a dust cap.
10
Hold the agitator base and use a 7/16th inch socket to remove the bolt and washer…
11
… and pull the agitator upwards to remove.
12
Now, carefully tilt the appliance back so its rear panel rests on a towel or carpet.
13
Next, unsnap the pump clips…
14
…and wiggle the pump off of the motor shaft.
15
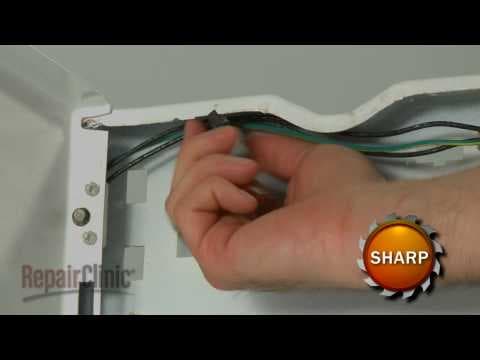
Disconnect the motor wire harness…
16
…and unclip the wires from the plastic retainer.
17
Use a ½” socket to remove the bolts attaching the gearcase to the base.
18
Now carefully pull the motor and gearcase assembly out.
19
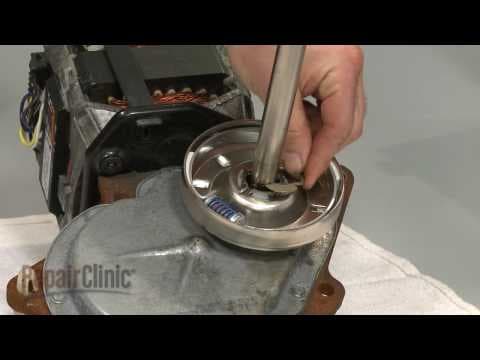
Detach the old brake cam by removing the “c” clip.
20
If still intact, remove the old clutch band and lining by squeezing the spring with pliers and lifting it out.
21
You’re now ready to install the new band and lining kit.
22
Place the new brake cam onto the drive tube and secure with the “c” clip.
23
Next, place the two caps onto the band…
24
…to hold the appropriate spring and spring dampener in place.
25
Please note that if you have a compact washer, you will need to install the shorter spring and dampener in the clutch band.
26
Otherwise, use the longer spring.
27
Use pliers to squeeze the spring to insert the new band and lining into the clutch housing.
28
Now slide the motor and gearcase assembly into position, making sure the clutch spring is opposite the brake cam.
29
Be aware this may require some adjustment before the gearcase sits flush against the base.
30
Secure with the bolts.
31
Secure…
32
…and reconnect the wire harness.
33
Next, align the motor shaft with the pump and slide the pump on.
34
Reinstall both pump clips.
35
Now, carefully lift the appliance to its upright position.
36
Place the agitator back onto the drive shaft…
37
…and reinstall the bolt and washer.
38
Replace the dust cap if your model has one.
39
Replace the agitator cap.
40
If your model has a rinse dispenser, push it down until it snaps into place and press the lock ring down with your thumbs.
41
Reattach the water hoses.
42
Turn the hot and cold water valves back on…
43
…and plug the appliance back in…
44
… to make sure it’s functioning properly.
45
Pr2845inletspoutmod11022622100
46
As with any repair, be sure you’ve unplugged the appliance before beginning.
47
Your first step is to move the control panel out of the way.
48
To do this, remove the screws found at either end.
49
On some models these screws may be located in the rear panel…
50
…or they may be covered by plastic end caps.
51
Pull the end cap off from the top to access the screw.
52
Remove both screws…
53
… and rotate the panel up.
54
Some models use clips instead of screws to secure the control panel.
55
Insert a putty knife between the control panel and the cabinet to release the clips.
56
Now, unplug the wire connector...
57
…and snap out the spring clips using a flathead screwdriver.
58
Tilt the cabinet toward you, slide forward and remove.
59
You’re now ready to replace the water inlet spout.
60
Use pliers to release the clamp that secures the hose to the spout and pull the hose off.
61
Push the two tabs of the old spout outwards and lift up to detach the spout from the rear panel.
62
Install the new water inlet spout…
63
By inserting the top portion of the tabs into the rear panel, then push the bottom portion of the tabs outward…
64
…and press down to lock the spout into place.
65
Reattach the hose and secure it with the clamp.
66
Now, reinstall the cabinet.
67
The front edge of the cabinet slides underneath the base frame.
68
Use your foot to push it into position.
69
Align the two notches in each side of the cabinet…
70
…with the tabs on each side of the base frame.
71
Now ease the cabinet to match up with the rear panel.
72
Reinstall the spring clips.
73
Reattach the wire connector.
74
Rotate the control panel down and lock the clips into place or reinstall the two screws.
75
If applicable to your model, replace the end caps by aligning…
76
…the tab with the slot at the bottom and snapping the cap into position.
77
You’re now ready to plug the appliance back in…
78
… to make sure it’s functioning properly.
79
Pr2858driveblockmod11022622100
80
As with any repair, be sure you’ve unplugged the appliance before beginning.
81
Your first step is to move the control panel out of the way.
82
To do this, remove the screws found at either end.
83
On some models these screws may be located in the rear panel…
84
…or they may be covered by plastic end caps.
85
Pull the end cap off from the top to access the screw.
86
Remove both screws…
87
… and rotate the panel up.
88
Some models use clips instead of screws to secure the control panel.
89
Insert a putty knife between the control panel and the cabinet to release the clips.
90
Now, unplug the wire connector...
91
…and snap out the spring clips using a flathead screwdriver.
92
Tilt the cabinet toward you, slide forward and remove.
93
Your next step is to remove the water inlet spout.
94
Use pliers to release the clamp that secures the hose to the spout and pull the hose off.
95
Push the two tabs of the spout outwards and lift up to detach the spout from the rear panel.
96
Now, remove the agitator.
97
If the dispenser has a lock ring, pull the ring up with your fingers, then twist the dispenser upwards to remove.
98
Next, remove the agitator cap.
99
Depending on your model, you may also need to remove a dust cap.
100
Hold the agitator base and use a 7/16th inch socket to remove the bolt and washer.
101
Lift the agitator off of the drive shaft.
102
Use a spanner wrench and hammer to remove the tub nut.
103
Next, remove the tub ring.
104
Press down on the rim to help release the eight tabs.
105
Now, remove the inner tub by lifting it
106
Straight up.
107
You’re now ready to replace the drive block.
108
To loosen the old drive block, gently tap it with a hammer, then pull it straight up off the drive tube.
109
Install the new drive block…
110
…by aligning the two slots in the block with the two tabs in the drive tube and pushing the block down into position.
111
Carefully replace the inner tub onto the drive shaft.
112
Align the tub ring with the outer tub…
113
… and secure it with the eight tabs.
114
Screw the tub nut onto the drive block and tighten it with the spanner wrench and hammer.
115
Next, place the agitator back onto the drive shaft…
116
……and reinstall the bolt and washer.
117
Replace the dust cap if your model has one.
118
Replace the agitator cap.
119
Snap the rinse dispenser into place and press the lock ring down with your thumbs.
120
Reintall the water inlet spout by inserting the top portion of the tabs into the rear panel, then push the bottom portion of the tabs outward…
121
…and press down to lock the spout into place.
122
Reattach the hose and secure it with the clamp.
123
Now, reinstall the cabinet.
124
The front edge of the cabinet slides underneath the base frame.
125
Use your foot to push it into position.
126
Align the two notches in each side of the cabinet…
127
…with the tabs on each side of the base frame.
128
Now ease the cabinet to match up with the rear panel.
129
Reinstall the spring clips.
130
Reattach the wire connector.
131
Rotate the control panel down and lock the clips into place or reinstall the two screws.
132
If applicable to your model, replace the end caps by aligning…
133
…the tab with the slot at the bottom and snapping the cap into position.
134
You’re now ready to plug the appliance back in…
135
… to make sure it’s functioning properly.
136
Pr2859capacmod11022622100
137
As with any repair, be sure you’ve unplugged the appliance before beginning.
138
Your first step is to move the control panel out of the way.
139
To do this, remove the screws found at either end.
140
On some models these screws may be located in the rear panel…
141
…or they may be covered by plastic end caps.
142
Pull the end cap off from the top to access the screw.
143
Remove both screws…
144
… and rotate the panel up.
145
Some models use clips instead of screws to secure the control panel.
146
Insert a putty knife between the control panel and the cabinet to release the clips.
147
Now, unplug the wire connector...
148
…and snap out the spring clips using a flathead screwdriver.
149
Tilt the cabinet toward you, slide forward and remove.
150
Depending on the model, the capacitor can be located in different areas within the washer.
151
Normally, the capacitor will be mounted to the rear panel…
152
…or to the motor housing.
153
Regardless of its location, release the old capacitor from its plastic or metal retainer…
154
…and disconnect the wires from the two terminals.
155
Install the new capacitor…
156
…by connecting the wires to its terminals…
157
…and securing the capacitor in the retainer.
158
Now, reinstall the cabinet.
159
The front edge of the cabinet slides underneath the base frame.
160
Use your foot to push it into position.
161
Align the two notches in each side of the cabinet…
162
…with the tabs on each side of the base frame.
163
Now ease the cabinet to match up with the rear panel.
164
Reinstall the spring clips.
165
Reattach the wire connector.
166
Rotate the control panel down and lock the clips into place or reinstall the two screws.
167
If applicable to your model, replace the end caps by aligning…
168
…the tab with the slot at the bottom and snapping the cap into position.
169
You’re now ready to plug the appliance back in…
170
… to make sure it’s functioning properly.
Description
This video provides step-by-step repair instructions for replacing the clutch band and lining kit on a Whirlpool/Kenmore top-loading washing machine. The most common reason for replacing the clutch band kit is when the washer won't spin.
All of the information for this clutch band and lining kit replacement video is applicable to the following brands:
Whirlpool, Kenmore, KitchenAid, Roper, Maytag, Estate, Inglis, Crosley, Amana, Admiral
Tools needed: flathead screwdriver, Phillips head screwdriver, pliers, putty knife. 7/16th socket, hex socket
All of the information for this clutch band and lining kit replacement video is applicable to the following brands:
Whirlpool, Kenmore, KitchenAid, Roper, Maytag, Estate, Inglis, Crosley, Amana, Admiral
Tools needed: flathead screwdriver, Phillips head screwdriver, pliers, putty knife. 7/16th socket, hex socket
Step-By-Step Instructions
1
Be sure you’ve unplugged the appliance before beginning…
2
… and turn off the hot and cold water supply valves.
3
You will also need to disconnect the two water supply hoses attached to the rear panel…
4
…along with the drain hose.
5
Be prepared for some water to spill out.
6
Next, you will need to remove the agitator.
7
If your model has a rinse dispenser, pull the lock ring up with your fingers and twist the dispenser upwards to remove.
8
Next, remove the agitator cap.
9
Depending on your model, you may also need to remove a dust cap.
10
Hold the agitator base and use a 7/16th inch socket to remove the bolt and washer…
11
… and pull the agitator upwards to remove.
12
Now, carefully tilt the appliance back so its rear panel rests on a towel or carpet.
13
Next, unsnap the pump clips…
14
…and wiggle the pump off of the motor shaft.
15
Disconnect the motor wire harness…
16
…and unclip the wires from the plastic retainer.
17
Use a ½” socket to remove the bolts attaching the gearcase to the base.
18
Now carefully pull the motor and gearcase assembly out.
19
Detach the old brake cam by removing the “c” clip.
20
If still intact, remove the old clutch band and lining by squeezing the spring with pliers and lifting it out.
21
You’re now ready to install the new band and lining kit.
22
Place the new brake cam onto the drive tube and secure with the “c” clip.
23
Next, place the two caps onto the band…
24
…to hold the appropriate spring and spring dampener in place.
25
Please note that if you have a compact washer, you will need to install the shorter spring and dampener in the clutch band.
26
Otherwise, use the longer spring.
27
Use pliers to squeeze the spring to insert the new band and lining into the clutch housing.
28
Now slide the motor and gearcase assembly into position, making sure the clutch spring is opposite the brake cam.
29
Be aware this may require some adjustment before the gearcase sits flush against the base.
30
Secure with the bolts.
31
Secure…
32
…and reconnect the wire harness.
33
Next, align the motor shaft with the pump and slide the pump on.
34
Reinstall both pump clips.
35
Now, carefully lift the appliance to its upright position.
36
Place the agitator back onto the drive shaft…
37
…and reinstall the bolt and washer.
38
Replace the dust cap if your model has one.
39
Replace the agitator cap.
40
If your model has a rinse dispenser, push it down until it snaps into place and press the lock ring down with your thumbs.
41
Reattach the water hoses.
42
Turn the hot and cold water valves back on…
43
…and plug the appliance back in…
44
… to make sure it’s functioning properly.
45
Pr2845inletspoutmod11022622100
46
As with any repair, be sure you’ve unplugged the appliance before beginning.
47
Your first step is to move the control panel out of the way.
48
To do this, remove the screws found at either end.
49
On some models these screws may be located in the rear panel…
50
…or they may be covered by plastic end caps.
51
Pull the end cap off from the top to access the screw.
52
Remove both screws…
53
… and rotate the panel up.
54
Some models use clips instead of screws to secure the control panel.
55
Insert a putty knife between the control panel and the cabinet to release the clips.
56
Now, unplug the wire connector...
57
…and snap out the spring clips using a flathead screwdriver.
58
Tilt the cabinet toward you, slide forward and remove.
59
You’re now ready to replace the water inlet spout.
60
Use pliers to release the clamp that secures the hose to the spout and pull the hose off.
61
Push the two tabs of the old spout outwards and lift up to detach the spout from the rear panel.
62
Install the new water inlet spout…
63
By inserting the top portion of the tabs into the rear panel, then push the bottom portion of the tabs outward…
64
…and press down to lock the spout into place.
65
Reattach the hose and secure it with the clamp.
66
Now, reinstall the cabinet.
67
The front edge of the cabinet slides underneath the base frame.
68
Use your foot to push it into position.
69
Align the two notches in each side of the cabinet…
70
…with the tabs on each side of the base frame.
71
Now ease the cabinet to match up with the rear panel.
72
Reinstall the spring clips.
73
Reattach the wire connector.
74
Rotate the control panel down and lock the clips into place or reinstall the two screws.
75
If applicable to your model, replace the end caps by aligning…
76
…the tab with the slot at the bottom and snapping the cap into position.
77
You’re now ready to plug the appliance back in…
78
… to make sure it’s functioning properly.
79
Pr2858driveblockmod11022622100
80
As with any repair, be sure you’ve unplugged the appliance before beginning.
81
Your first step is to move the control panel out of the way.
82
To do this, remove the screws found at either end.
83
On some models these screws may be located in the rear panel…
84
…or they may be covered by plastic end caps.
85
Pull the end cap off from the top to access the screw.
86
Remove both screws…
87
… and rotate the panel up.
88
Some models use clips instead of screws to secure the control panel.
89
Insert a putty knife between the control panel and the cabinet to release the clips.
90
Now, unplug the wire connector...
91
…and snap out the spring clips using a flathead screwdriver.
92
Tilt the cabinet toward you, slide forward and remove.
93
Your next step is to remove the water inlet spout.
94
Use pliers to release the clamp that secures the hose to the spout and pull the hose off.
95
Push the two tabs of the spout outwards and lift up to detach the spout from the rear panel.
96
Now, remove the agitator.
97
If the dispenser has a lock ring, pull the ring up with your fingers, then twist the dispenser upwards to remove.
98
Next, remove the agitator cap.
99
Depending on your model, you may also need to remove a dust cap.
100
Hold the agitator base and use a 7/16th inch socket to remove the bolt and washer.
101
Lift the agitator off of the drive shaft.
102
Use a spanner wrench and hammer to remove the tub nut.
103
Next, remove the tub ring.
104
Press down on the rim to help release the eight tabs.
105
Now, remove the inner tub by lifting it
106
Straight up.
107
You’re now ready to replace the drive block.
108
To loosen the old drive block, gently tap it with a hammer, then pull it straight up off the drive tube.
109
Install the new drive block…
110
…by aligning the two slots in the block with the two tabs in the drive tube and pushing the block down into position.
111
Carefully replace the inner tub onto the drive shaft.
112
Align the tub ring with the outer tub…
113
… and secure it with the eight tabs.
114
Screw the tub nut onto the drive block and tighten it with the spanner wrench and hammer.
115
Next, place the agitator back onto the drive shaft…
116
……and reinstall the bolt and washer.
117
Replace the dust cap if your model has one.
118
Replace the agitator cap.
119
Snap the rinse dispenser into place and press the lock ring down with your thumbs.
120
Reintall the water inlet spout by inserting the top portion of the tabs into the rear panel, then push the bottom portion of the tabs outward…
121
…and press down to lock the spout into place.
122
Reattach the hose and secure it with the clamp.
123
Now, reinstall the cabinet.
124
The front edge of the cabinet slides underneath the base frame.
125
Use your foot to push it into position.
126
Align the two notches in each side of the cabinet…
127
…with the tabs on each side of the base frame.
128
Now ease the cabinet to match up with the rear panel.
129
Reinstall the spring clips.
130
Reattach the wire connector.
131
Rotate the control panel down and lock the clips into place or reinstall the two screws.
132
If applicable to your model, replace the end caps by aligning…
133
…the tab with the slot at the bottom and snapping the cap into position.
134
You’re now ready to plug the appliance back in…
135
… to make sure it’s functioning properly.
136
Pr2859capacmod11022622100
137
As with any repair, be sure you’ve unplugged the appliance before beginning.
138
Your first step is to move the control panel out of the way.
139
To do this, remove the screws found at either end.
140
On some models these screws may be located in the rear panel…
141
…or they may be covered by plastic end caps.
142
Pull the end cap off from the top to access the screw.
143
Remove both screws…
144
… and rotate the panel up.
145
Some models use clips instead of screws to secure the control panel.
146
Insert a putty knife between the control panel and the cabinet to release the clips.
147
Now, unplug the wire connector...
148
…and snap out the spring clips using a flathead screwdriver.
149
Tilt the cabinet toward you, slide forward and remove.
150
Depending on the model, the capacitor can be located in different areas within the washer.
151
Normally, the capacitor will be mounted to the rear panel…
152
…or to the motor housing.
153
Regardless of its location, release the old capacitor from its plastic or metal retainer…
154
…and disconnect the wires from the two terminals.
155
Install the new capacitor…
156
…by connecting the wires to its terminals…
157
…and securing the capacitor in the retainer.
158
Now, reinstall the cabinet.
159
The front edge of the cabinet slides underneath the base frame.
160
Use your foot to push it into position.
161
Align the two notches in each side of the cabinet…
162
…with the tabs on each side of the base frame.
163
Now ease the cabinet to match up with the rear panel.
164
Reinstall the spring clips.
165
Reattach the wire connector.
166
Rotate the control panel down and lock the clips into place or reinstall the two screws.
167
If applicable to your model, replace the end caps by aligning…
168
…the tab with the slot at the bottom and snapping the cap into position.
169
You’re now ready to plug the appliance back in…
170
… to make sure it’s functioning properly.
Applicable Product Model
Parts Needed
Clutch Band Kit
$47.40
Recommended Tools and Accessories
Clutch
$38.94
Cleaner
$7.62
Multi Screwdriver
$59.00
Pliers
$31.42
Pliers
$32.64
Total$0.00
Related Articles & Videos
04:10
Part Replacement
Washer Won't Spin? Replace Whirlpool Direct Drive Clutch Assembly Part # 285785




Our Story
Family-owned and operated since 1912, Burke America Parts Group is the longest-running genuine appliance, HVAC, and outdoor power equipment parts solution in North America. At Repair Clinic, we're proud to be an international brand trusted by the pros as well as the DIY community.
About Repair Clinic
© 2026 RepairClinic.com