

Price Match Guarantee

In-stock parts ship the same day

365-Day Return Policy
Price Match GuaranteeGET PRO PRICING
Video & Articles: Appliance & Equipment RepairWhirlpool Top Load Washer Suspension Kit #W10780053

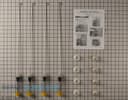
Whirlpool Top Load Washer Suspension Kit #W10780053
Skill Level
Total Parts Cost
$75.94Estimated Savings
$112.5005:52
- Description
This video provides step-by-step repair instructions for replacing the suspension rods on a Whirlpool washer. The most common reason for replacing the suspension rods is if the washer is shaking or vibrating during operation.
This suspension kit replacement video is applicable to the following brands:
Whirlpool, Amana, Crosley, Inglis, Kenmore, Maytag, Roper
Tools needed: quarter-inch socket or nut driver
This suspension kit replacement video is applicable to the following brands:
Whirlpool, Amana, Crosley, Inglis, Kenmore, Maytag, Roper
Tools needed: quarter-inch socket or nut driver
Step By Step Instructions
1
Before you install the suspension kit components in your washer be sure to unplug the power cord
2
Shut off the water supply.
3
Remove the hot and cold water supply lines from the inlet valve – be prepared for some water to spill out.
4
Release the retaining clamp and detach the drain hose from the outlet hose mounting flange.
5
Next, use a quarter-inch socket or nut driver to unthread the screw securing the wiring harness and tube guard and remove the guard.
6
Now use tape to secure the washer lid.
7
Next, unthread the rear screws securing the main top to the cabinet.
8
Slide the main top forward to release.
9
Lift the top up, making sure the rear cabinet tabs are inserted into the slots in the top.
10
Make sure the main top is securely supported.
11
To help protect the washer cabinet, place one towel at the rear of the tub and one at the front and secure them with spring clamps.
12
Now lift up the old suspension rods and rotate the ball supports to detach them.
13
Hook the rear rods on the support brace.
14
Remove all the bushings from the braces.
15
Now lower the main top and slide it into position.
16
Replace at least one of the rear screws to secure the top.
17
Now carefully tip the washer back so it rests on its rear panel.
18
You can now slide the old suspension rods out.
19
You will need to push on the spring to unhook the rear rods from the brace before you can fully remove them.
20
You’re now ready to install the new suspension kit components
21
Slide the new rods through the holes in the outer tub.
22
The rear rods will need to be hooked onto the rear support brace.
23
Return the appliance to its upright position.
24
Remove the rear screw and lift up the main top.
25
Now snap all of the new bushings into place on the support braces.
26
Starting at the front, lift the suspension rods through the bushings and attach the ball supports.
27
With the rods in place, remove the towels.
28
Now lower the main top and slide the top into position.
29
Replace the rear screws to secure.
30
Remove the tape securing the lid.
31
Reposition the wiring harness and tube guard and rethread the screw to secure.
32
Attach the drain hose to the outlet hose and secure it with the clamp.
33
Attach the hot and cold water supply lines.
34
With the repair completed turn the water supply back on plug the power cord back in and your washer should be ready for use.
Description
This video provides step-by-step repair instructions for replacing the suspension rods on a Whirlpool washer. The most common reason for replacing the suspension rods is if the washer is shaking or vibrating during operation.
This suspension kit replacement video is applicable to the following brands:
Whirlpool, Amana, Crosley, Inglis, Kenmore, Maytag, Roper
Tools needed: quarter-inch socket or nut driver
This suspension kit replacement video is applicable to the following brands:
Whirlpool, Amana, Crosley, Inglis, Kenmore, Maytag, Roper
Tools needed: quarter-inch socket or nut driver
Step-By-Step Instructions
1
Before you install the suspension kit components in your washer be sure to unplug the power cord
2
Shut off the water supply.
3
Remove the hot and cold water supply lines from the inlet valve – be prepared for some water to spill out.
4
Release the retaining clamp and detach the drain hose from the outlet hose mounting flange.
5
Next, use a quarter-inch socket or nut driver to unthread the screw securing the wiring harness and tube guard and remove the guard.
6
Now use tape to secure the washer lid.
7
Next, unthread the rear screws securing the main top to the cabinet.
8
Slide the main top forward to release.
9
Lift the top up, making sure the rear cabinet tabs are inserted into the slots in the top.
10
Make sure the main top is securely supported.
11
To help protect the washer cabinet, place one towel at the rear of the tub and one at the front and secure them with spring clamps.
12
Now lift up the old suspension rods and rotate the ball supports to detach them.
13
Hook the rear rods on the support brace.
14
Remove all the bushings from the braces.
15
Now lower the main top and slide it into position.
16
Replace at least one of the rear screws to secure the top.
17
Now carefully tip the washer back so it rests on its rear panel.
18
You can now slide the old suspension rods out.
19
You will need to push on the spring to unhook the rear rods from the brace before you can fully remove them.
20
You’re now ready to install the new suspension kit components
21
Slide the new rods through the holes in the outer tub.
22
The rear rods will need to be hooked onto the rear support brace.
23
Return the appliance to its upright position.
24
Remove the rear screw and lift up the main top.
25
Now snap all of the new bushings into place on the support braces.
26
Starting at the front, lift the suspension rods through the bushings and attach the ball supports.
27
With the rods in place, remove the towels.
28
Now lower the main top and slide the top into position.
29
Replace the rear screws to secure.
30
Remove the tape securing the lid.
31
Reposition the wiring harness and tube guard and rethread the screw to secure.
32
Attach the drain hose to the outlet hose and secure it with the clamp.
33
Attach the hot and cold water supply lines.
34
With the repair completed turn the water supply back on plug the power cord back in and your washer should be ready for use.
Applicable Product Model




Our Story
Family-owned and operated since 1912, Burke America Parts Group is the longest-running genuine appliance, HVAC, and outdoor power equipment parts solution in North America. At Repair Clinic, we're proud to be an international brand trusted by the pros as well as the DIY community.
About Repair Clinic
© 2026 RepairClinic.com