

Price Match Guarantee

In-stock parts ship the same day

365-Day Return Policy
Price Match GuaranteeGET PRO PRICING
Video & Articles: Appliance & Equipment RepairKitchenAid 5 Door Refrigerator Center Pantry Drawer Slide Replacement W10847589 


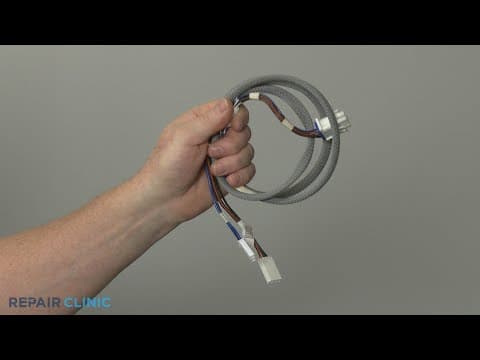
KitchenAid 5 Door Refrigerator Center Pantry Drawer Slide Replacement W10847589
Skill Level
Total Parts Cost
$39.13Estimated Savings
$112.5009:24
- Description
This video provides step-by-step repair instructions for replacing the center pantry drawer slide on a KitchenAid 5 Door Refrigerator (Model KRMF706ESS01). The most common reason for replacing this part is if the pantry drawer is not opening properly.
All of the information for this video is applicable to the following brands:
Whirlpool, Maytag, Amana, Kitchenaid, Kenmore
All of the information for this video is applicable to the following brands:
Whirlpool, Maytag, Amana, Kitchenaid, Kenmore
Step By Step Instructions
1
KitchenAid Five-Door Refrigerator - KRMF706ESS01
2
Refrigerator Center Pantry Drawer Slide Assembly Replacement
3
heavy, sharp, shock, water
4
Shock
5
unplug the power cord
6
use a Phillip's-head screwdriver to unthread the screws securing the two top hinge covers
7
lift off the covers
8
to remove the top left hinge, lift up the clasp and detach the dispenser water supply line
9
depress the catch to disconnect the wire connecter
10
unthread the screw to release the grounding wire
11
use a t-25 torx bit to unthread the front and rear mounting screws securing the top hinges to the appliance
12
Heavy
13
support each door as you remove the hinge
14
open each door to a ninety degree position and have an assistant help you lift the doors off
15
unthread the three mounting screws to release the left and right center hinges from the frame
16
remove all of the shelving from the refrigerator compartment
17
Fragile
18
lift out the glass covering the crisper drawers
19
remove the glass frame along with the drawers
20
lift out the storage tray
21
open the pantry drawers and remove both bins
22
push up on the levers at the bottom of both drawer glide brackets to release the right drawer front from the brackets
23
slide the glides back into the refrigerator
24
to remove the left drawer front, you will need to detach the wire connection cover
25
then use a small flat-head screwdriver to help disconnect the temperature control wire connecter
26
you can now release the drawer front from the drawer glide brackets and fully remove it
27
depress the tabs to release the wire harness access cover on the left side of the crisper drawer support panel
28
disconnect the light switch harness
29
release the tabs securing the crisper drawer support panel
30
lift the front of the panel up and pull forward to remove
31
use a thin putty knife to detach the vertical frame mullion then disconnect the wire connecter
32
detach the access cover on the right side of the interior liner
33
disconnect the two light switch wire connecters
34
use a quarter-inch socket to unthread the screw securing the horizontal frame mullion assembly
35
release the tabs on both sides of the assembly and fully remove
36
Heavy
37
lift out the center pantry drawer slide assembly
38
position the new assembly on the guide fastened to the liner
39
keeping the wires secured, reinstall the horizontal frame mullion assembly
40
rethread the screws
41
reconnect the wire connecters and replace the access cover
42
reconnect the vertical frame mullion wire connecter
43
make sure the tabs are straight then snap the frame into place
44
feed the crisper drawer support panel wire harness through the side housing as you reposition the support panel
45
connect the wire connecter and replace the cover
46
replace the pantry drawer fronts by first pushing up on the lever at the bottom of the glide bracket to open
47
insert the drawer front bracket into the glide bracket and release the lever to lock the drawer front in place
48
repeat for opposite side
49
replace the cover
50
reposition the drawer bins
51
replace the storage tray
52
reposition the crisper drawers
53
realign the glass frame and replace the glass
54
replace all of the shelving
55
confirm the cam at the bottom of each door is properly set
56
Heavy
57
with the hinge base parallel with the door, insert the hinge pin and bushing into the hole
58
rotate the hinge so the base is at a ninety degree angle to the door to reset the cam
59
realign both center hinges on the frame
60
thread the mounting screws to secure
61
make sure the hinge bushing and washer are intact
62
set each door on its respective bushing at a ninety degree angle and confirm it closes properly
63
reinstall the top hinges
64
feed the wires and water line through the hole in the left hinge as you position it on the door
65
thread the mounting screws to secure
66
slide the bushing over the wires and water line and insert it into the hinge
67
connect the wire connecter and thread the screw to secure the grounding wire
68
reattach the water supply line
69
replace both hinge cover and secure them with the screws
70
Shock
71
plug the power cord back in
Description
This video provides step-by-step repair instructions for replacing the center pantry drawer slide on a KitchenAid 5 Door Refrigerator (Model KRMF706ESS01). The most common reason for replacing this part is if the pantry drawer is not opening properly.
All of the information for this video is applicable to the following brands:
Whirlpool, Maytag, Amana, Kitchenaid, Kenmore
All of the information for this video is applicable to the following brands:
Whirlpool, Maytag, Amana, Kitchenaid, Kenmore
Step-By-Step Instructions
1
KitchenAid Five-Door Refrigerator - KRMF706ESS01
2
Refrigerator Center Pantry Drawer Slide Assembly Replacement
3
heavy, sharp, shock, water
4
Shock
5
unplug the power cord
6
use a Phillip's-head screwdriver to unthread the screws securing the two top hinge covers
7
lift off the covers
8
to remove the top left hinge, lift up the clasp and detach the dispenser water supply line
9
depress the catch to disconnect the wire connecter
10
unthread the screw to release the grounding wire
11
use a t-25 torx bit to unthread the front and rear mounting screws securing the top hinges to the appliance
12
Heavy
13
support each door as you remove the hinge
14
open each door to a ninety degree position and have an assistant help you lift the doors off
15
unthread the three mounting screws to release the left and right center hinges from the frame
16
remove all of the shelving from the refrigerator compartment
17
Fragile
18
lift out the glass covering the crisper drawers
19
remove the glass frame along with the drawers
20
lift out the storage tray
21
open the pantry drawers and remove both bins
22
push up on the levers at the bottom of both drawer glide brackets to release the right drawer front from the brackets
23
slide the glides back into the refrigerator
24
to remove the left drawer front, you will need to detach the wire connection cover
25
then use a small flat-head screwdriver to help disconnect the temperature control wire connecter
26
you can now release the drawer front from the drawer glide brackets and fully remove it
27
depress the tabs to release the wire harness access cover on the left side of the crisper drawer support panel
28
disconnect the light switch harness
29
release the tabs securing the crisper drawer support panel
30
lift the front of the panel up and pull forward to remove
31
use a thin putty knife to detach the vertical frame mullion then disconnect the wire connecter
32
detach the access cover on the right side of the interior liner
33
disconnect the two light switch wire connecters
34
use a quarter-inch socket to unthread the screw securing the horizontal frame mullion assembly
35
release the tabs on both sides of the assembly and fully remove
36
Heavy
37
lift out the center pantry drawer slide assembly
38
position the new assembly on the guide fastened to the liner
39
keeping the wires secured, reinstall the horizontal frame mullion assembly
40
rethread the screws
41
reconnect the wire connecters and replace the access cover
42
reconnect the vertical frame mullion wire connecter
43
make sure the tabs are straight then snap the frame into place
44
feed the crisper drawer support panel wire harness through the side housing as you reposition the support panel
45
connect the wire connecter and replace the cover
46
replace the pantry drawer fronts by first pushing up on the lever at the bottom of the glide bracket to open
47
insert the drawer front bracket into the glide bracket and release the lever to lock the drawer front in place
48
repeat for opposite side
49
replace the cover
50
reposition the drawer bins
51
replace the storage tray
52
reposition the crisper drawers
53
realign the glass frame and replace the glass
54
replace all of the shelving
55
confirm the cam at the bottom of each door is properly set
56
Heavy
57
with the hinge base parallel with the door, insert the hinge pin and bushing into the hole
58
rotate the hinge so the base is at a ninety degree angle to the door to reset the cam
59
realign both center hinges on the frame
60
thread the mounting screws to secure
61
make sure the hinge bushing and washer are intact
62
set each door on its respective bushing at a ninety degree angle and confirm it closes properly
63
reinstall the top hinges
64
feed the wires and water line through the hole in the left hinge as you position it on the door
65
thread the mounting screws to secure
66
slide the bushing over the wires and water line and insert it into the hinge
67
connect the wire connecter and thread the screw to secure the grounding wire
68
reattach the water supply line
69
replace both hinge cover and secure them with the screws
70
Shock
71
plug the power cord back in
Applicable Product Model
Parts Needed
Shelf Support
$39.13
Total$0.00
Related Articles & Videos
14:37
Part Replacement
KitchenAid 5 Door Refrigerator Evaporator Fan Motor Replacement W11087438
01:42
Part Replacement
KitchenAid 5 Door Refrigerator LED Light Assembly Replacement W10908166
09:31
Part Replacement
KitchenAid 5 Door Refrigerator Freezer Evaporator Fan Motor Replacement W11249952
12:07
Part Replacement
KitchenAid 5 Door Refrigerator Pantry Drawer Wire Harness Replacement W11170612




Our Story
Family-owned and operated since 1912, Burke America Parts Group is the longest-running genuine appliance, HVAC, and outdoor power equipment parts solution in North America. At Repair Clinic, we're proud to be an international brand trusted by the pros as well as the DIY community.
About Repair Clinic
© 2026 RepairClinic.com