

Price Match Guarantee

In-stock parts ship the same day

365-Day Return Policy
Price Match GuaranteeGET PRO PRICING
Video & Articles: Appliance & Equipment RepairFrigidaire Electric Laundry Center Rear Blower Housing Replacement (137551800) 

Frigidaire Electric Laundry Center Rear Blower Housing Replacement (137551800)
Skill Level
Total Parts Cost
$87.95Estimated Savings
$112.5013:36
- Description
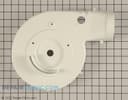
This video provides step-by-step repair instructions for replacing the rear blower housing on a Frigidaire electric washer/dryer laundry center (model FFLE3900UW1). The most common reason for replacing this part is if the dryer is noisy.
This replacement video is applicable to the following brands:
Frigidaire
Don't forget to like and comment on this video and subscribe to our channel!
This replacement video is applicable to the following brands:
Frigidaire
Don't forget to like and comment on this video and subscribe to our channel!
Step By Step Instructions
1
Laundry Center- Model FFLE3900UW1
2
Laundry Center Rear Blower Housing Replacement
3
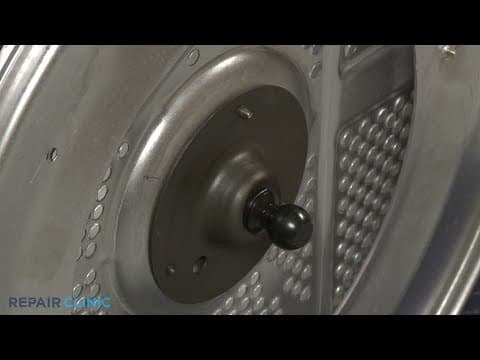
"Step 1: Gather a number two square drive bit or a phillips-head screwdriver, and needle-nose pliers. "
4
Step 2: Unplug the power cord.
5
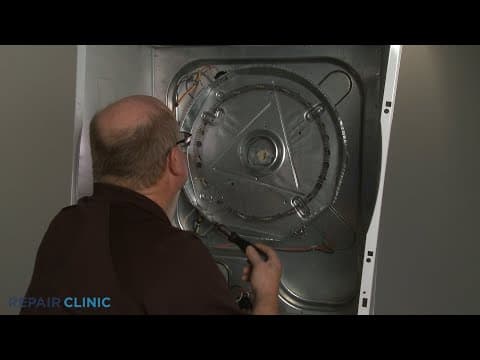
Step 3: Have an assistant help you to move the appliance away from the wall or out of the closet.
6
Step 4: Detach the venting from the dryer to fully access the rear of the laundry center.
7
"Step 5: Shut off the incoming water and remove the hot and cold water supply lines as well.
"
8
"Step 6: If necessary, remove the drain hose from the standpipe or laundry tub. "
9
"Step 7: Use the number two square drive bit or the phillips-head screwdriver to unthread the two screws securing the dryer access panel.
"
10
Step 8: Set the panel aside.
11
Step 9: Move the idler arm to the left so you can detach the belt from the motor pulley and idler pulley.
12
"Step 10: Unthread the four screws securing the rear of the top panel which will make it easier to remove the drum.
"
13
Step 11: Use the number two square drive bit or the phillips-head screwdriver to unthread the two screws securing the dryer's lower access panel.
14
"Step 12: Pull the panel up to remove.
"
15
Step 13: Unthread the two mounting screws securing the control panel.
16
Step 14: Pull the panel down to detach.
17
Step 15: Release the wires from the retaining clip and move the panel out of the way.
18
Step 16: Disconnect the dryer door switch wire connecter.
19
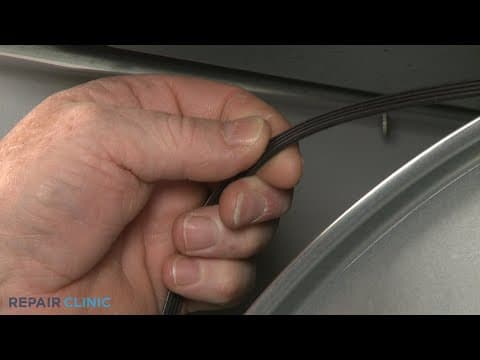
Step 17: Unthread the upper left screw securing the inner access panel which will make it easier to fully remove the front panel and lint filter duct assembly.
20
Step 18: Use the phillips-head screwdriver to unthread the two lower screws securing the front panel.
21
Step 19: Unthread the four upper screws along the top of the cabinet.
22
"Step 20: With all the screws unthreaded, fully remove the front panel and lint filter duct assembly."
23
Step 21: Unthread the screw to remove the drum stop.
24
Step 22: Lift the rear of the drum up to detach the bearing from the drum up to detach the bearing from the support then carefully remove the drum from the cabinet.
25
Step 23: Unthread the screw securing the vent to the blower housing.
26
Step 24: Slide the idler arm off the mounting pin and detach the idler spring from the frame.
27
Step 25: Pull the mounting bracket retaining tabs outward to release the belt switch.
28
"Step 26: Using the needle-nose pliers, detach the wires from thermistor mounted on the rear blower housing. "
29
Step 27: Unthread the two screws securing the drive motor mounting bracket as well as the grounding screw.
30
"Step 28: Disconnect the motor wire harness.
"
31
Step 29: Pull the motor and blower assembly back and up to detach.
32
Step 30: Fully remove the assembly from the front of the appliance.
33
Step 31: Unthread the six screws holding the two halves of the blower housing together.
34
Step 32: Set the front half of the blower housing aside.
35
Step 33: Use the needle-nose pliers to remove the retaining clamp and pull the blower wheel off.
36
Step 34: Unthread the three mounting screws securing the blower housing to the motor bracket and pull the old housing free.
37
"Step 35: To prepare the new rear half of the blower housing for installation, transfer the thermistor from the old housing to the new one."
38
Step 36: Position the new rear half of the blower housing on the motor bracket and thread the screws to secure.
39
Step 37: Realign the blower wheel on the motor shaft and secure it with the retaining clamp.
40
Step 38: Position the front hald of the blower housing and thread the six mounting screws.
41
Step 39: Set the assembly on the base then from the rear of the appliance fully seat the assembly by inserting the motor bracket tab into the slot in the base.
42
Step 40: Reconnect the motor wire harness.
43
Step 41: Rethread the two screws to secure the motor bracket as well as the screw to secure the grounding wires.
44
Step 42: Reconnect the wires to thermistor terminals.
45
"Step 43: With the switch actuator facing left, snap the belt switch into place in the mounting bracket."
46
Step 44: Reinstall the idler arm and spring by first inserting the spring into the slots in the frame.
47
"Step 45: With the pulley facing outward, realign the arm on the mounting pin. "
48
Step 46: Replace the screw securing the vent to the blower housing.
49
"Step 47: With the belt looped around the drum with its grooved side facing inward, reinstall the drum, making sure the rear bearing is inserted into the bearing support. "
50
Step 48: Reposition the drum stop and thread the screw to secure.
51
Step 49: Reinstall the front panel by positioning the lower portion of the lint filter duct behind the inner access panel as you align the front panel mounting pins with the holes in the cabinet frame.
52
Step 50: Rethread the four upper screws- it will be easier to replace the two middle screws first.
53
Step 51: Rethread the two lower screws.
54
Step 52: Rethread the upper left screw to fully secure the inner access panel.
55
Step 53: Reconnect the door switch wire connecter.
56
Step 54: Secure the control panel wires in the retaining clip then reposition the panel.
57
Step 55: Replace the mounting screws.
58
Step 56: Realign the access panel and secure it with the screws.
59
Step 57: Confirm the top panel and frame are aligned then rethread the four screws to secure.
60
Step 58: Loop the drum belt onto the idler and motor pullies in a zig-zag formation.
61
Step 59: Rotate the drum to help fullt align the belt.
62
Step 60: Reinstall the access panel by inserting the tabs into the slots first then rethread the screws.
63
"Step 61: If necessary, reinsert the drain hose into the standpipe or hook it onto the edge of the tub. "
64
Step 62: Reattach the hot and cold water supply lines to the inlet valve ports.
65
Step 63: Move the appliance back against the wall or into the closet.
66
Step 64: Turn the water supply back on if necessary.
67
Step 65: Plug the power cord back in.
68
Congratulations! Your laundry center should be ready for use.
Description
This video provides step-by-step repair instructions for replacing the rear blower housing on a Frigidaire electric washer/dryer laundry center (model FFLE3900UW1). The most common reason for replacing this part is if the dryer is noisy.
This replacement video is applicable to the following brands:
Frigidaire
Don't forget to like and comment on this video and subscribe to our channel!
This replacement video is applicable to the following brands:
Frigidaire
Don't forget to like and comment on this video and subscribe to our channel!
Step-By-Step Instructions
1
Laundry Center- Model FFLE3900UW1
2
Laundry Center Rear Blower Housing Replacement
3
"Step 1: Gather a number two square drive bit or a phillips-head screwdriver, and needle-nose pliers. "
4
Step 2: Unplug the power cord.
5
Step 3: Have an assistant help you to move the appliance away from the wall or out of the closet.
6
Step 4: Detach the venting from the dryer to fully access the rear of the laundry center.
7
"Step 5: Shut off the incoming water and remove the hot and cold water supply lines as well.
"
8
"Step 6: If necessary, remove the drain hose from the standpipe or laundry tub. "
9
"Step 7: Use the number two square drive bit or the phillips-head screwdriver to unthread the two screws securing the dryer access panel.
"
10
Step 8: Set the panel aside.
11
Step 9: Move the idler arm to the left so you can detach the belt from the motor pulley and idler pulley.
12
"Step 10: Unthread the four screws securing the rear of the top panel which will make it easier to remove the drum.
"
13
Step 11: Use the number two square drive bit or the phillips-head screwdriver to unthread the two screws securing the dryer's lower access panel.
14
"Step 12: Pull the panel up to remove.
"
15
Step 13: Unthread the two mounting screws securing the control panel.
16
Step 14: Pull the panel down to detach.
17
Step 15: Release the wires from the retaining clip and move the panel out of the way.
18
Step 16: Disconnect the dryer door switch wire connecter.
19
Step 17: Unthread the upper left screw securing the inner access panel which will make it easier to fully remove the front panel and lint filter duct assembly.
20
Step 18: Use the phillips-head screwdriver to unthread the two lower screws securing the front panel.
21
Step 19: Unthread the four upper screws along the top of the cabinet.
22
"Step 20: With all the screws unthreaded, fully remove the front panel and lint filter duct assembly."
23
Step 21: Unthread the screw to remove the drum stop.
24
Step 22: Lift the rear of the drum up to detach the bearing from the drum up to detach the bearing from the support then carefully remove the drum from the cabinet.
25
Step 23: Unthread the screw securing the vent to the blower housing.
26
Step 24: Slide the idler arm off the mounting pin and detach the idler spring from the frame.
27
Step 25: Pull the mounting bracket retaining tabs outward to release the belt switch.
28
"Step 26: Using the needle-nose pliers, detach the wires from thermistor mounted on the rear blower housing. "
29
Step 27: Unthread the two screws securing the drive motor mounting bracket as well as the grounding screw.
30
"Step 28: Disconnect the motor wire harness.
"
31
Step 29: Pull the motor and blower assembly back and up to detach.
32
Step 30: Fully remove the assembly from the front of the appliance.
33
Step 31: Unthread the six screws holding the two halves of the blower housing together.
34
Step 32: Set the front half of the blower housing aside.
35
Step 33: Use the needle-nose pliers to remove the retaining clamp and pull the blower wheel off.
36
Step 34: Unthread the three mounting screws securing the blower housing to the motor bracket and pull the old housing free.
37
"Step 35: To prepare the new rear half of the blower housing for installation, transfer the thermistor from the old housing to the new one."
38
Step 36: Position the new rear half of the blower housing on the motor bracket and thread the screws to secure.
39
Step 37: Realign the blower wheel on the motor shaft and secure it with the retaining clamp.
40
Step 38: Position the front hald of the blower housing and thread the six mounting screws.
41
Step 39: Set the assembly on the base then from the rear of the appliance fully seat the assembly by inserting the motor bracket tab into the slot in the base.
42
Step 40: Reconnect the motor wire harness.
43
Step 41: Rethread the two screws to secure the motor bracket as well as the screw to secure the grounding wires.
44
Step 42: Reconnect the wires to thermistor terminals.
45
"Step 43: With the switch actuator facing left, snap the belt switch into place in the mounting bracket."
46
Step 44: Reinstall the idler arm and spring by first inserting the spring into the slots in the frame.
47
"Step 45: With the pulley facing outward, realign the arm on the mounting pin. "
48
Step 46: Replace the screw securing the vent to the blower housing.
49
"Step 47: With the belt looped around the drum with its grooved side facing inward, reinstall the drum, making sure the rear bearing is inserted into the bearing support. "
50
Step 48: Reposition the drum stop and thread the screw to secure.
51
Step 49: Reinstall the front panel by positioning the lower portion of the lint filter duct behind the inner access panel as you align the front panel mounting pins with the holes in the cabinet frame.
52
Step 50: Rethread the four upper screws- it will be easier to replace the two middle screws first.
53
Step 51: Rethread the two lower screws.
54
Step 52: Rethread the upper left screw to fully secure the inner access panel.
55
Step 53: Reconnect the door switch wire connecter.
56
Step 54: Secure the control panel wires in the retaining clip then reposition the panel.
57
Step 55: Replace the mounting screws.
58
Step 56: Realign the access panel and secure it with the screws.
59
Step 57: Confirm the top panel and frame are aligned then rethread the four screws to secure.
60
Step 58: Loop the drum belt onto the idler and motor pullies in a zig-zag formation.
61
Step 59: Rotate the drum to help fullt align the belt.
62
Step 60: Reinstall the access panel by inserting the tabs into the slots first then rethread the screws.
63
"Step 61: If necessary, reinsert the drain hose into the standpipe or hook it onto the edge of the tub. "
64
Step 62: Reattach the hot and cold water supply lines to the inlet valve ports.
65
Step 63: Move the appliance back against the wall or into the closet.
66
Step 64: Turn the water supply back on if necessary.
67
Step 65: Plug the power cord back in.
68
Congratulations! Your laundry center should be ready for use.
Applicable Product Model
Parts Needed
Blower Housing
$87.95
Total$0.00
Related Articles & Videos
07:04
Part Replacement
Frigidaire Electric Laundry Center Dryer Drum Belt Replacement (134503600)
10:24
Part Replacement
Frigidaire Electric Laundry Center Heater Assembly Replacement (137392702)
09:35
Part Replacement
Frigidaire Electric Laundry Center Dryer Drum Bearing Replacement (131777700)
18:36
Part Replacement
Frigidaire Laundry Center Washer Transmission Assembly Replacement (5304517318)
04:37
Part Replacement
Frigidaire Laundry Center Water Inlet Valve Replacement (5304515818)




Our Story
Family-owned and operated since 1912, Burke America Parts Group is the longest-running genuine appliance, HVAC, and outdoor power equipment parts solution in North America. At Repair Clinic, we're proud to be an international brand trusted by the pros as well as the DIY community.
About Repair Clinic
© 2026 RepairClinic.com