

Price Match Guarantee

In-stock parts ship the same day

365-Day Return Policy
Price Match GuaranteeGET PRO PRICING
Video & Articles: Appliance & Equipment RepairAO Smith Gas Water Heater Gas Valve Assembly Replacement 100111369 


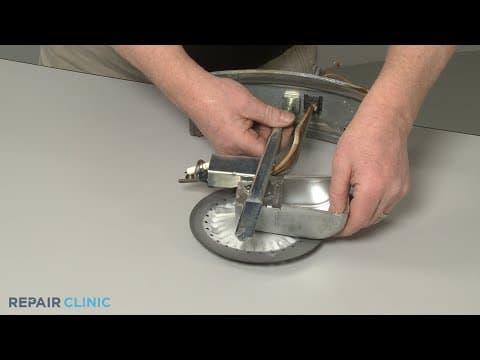
AO Smith Gas Water Heater Gas Valve Assembly Replacement 100111369
Skill Level
Total Parts Cost
$302.56Estimated Savings
$112.5007:34
- Description
This video provides step-by-step instructions for replacing the gas valve assembly on AO Smith gas water heaters. The most common reasons for replacing this part is if the burner will not light.
All of the information in this thermostat replacement video is applicable to the following brands: AO Smith
All of the information in this thermostat replacement video is applicable to the following brands: AO Smith
Step By Step Instructions
1
To replace the gas valve assembly on this a.o. smith gas water heater…
2
… you will need a pipe wrench, channel-lock pliers, a 7/16th inch wrench, a 3/8th inch wrench, an adjustable wrench, and thread sealant.
3
Before you begin the procedure, shut off the gas supply to the unit.
4
Close the water intake valve as well.
5
Now open the drain valve to drain all of the water from the tank.
6
You can open a hot water faucet in the home to assist in discharging the water.
7
After draining the water, close the drain valve.
8
Use a pipe wrench and channel-lock pliers to help unthread the gas pipe union.
9
Unthread the pipe from the t-pipe, if applicable.
10
Unthread the drip leg from the t-pipe.
11
Partially unthread the t-pipe from the gas valve assembly.
12
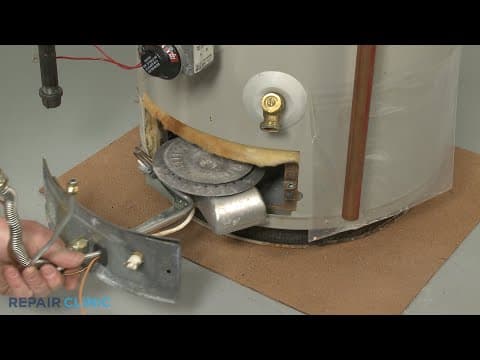
Detach the outer burner tube assembly cover.
13
Disconnect the safety thermostat wires…
14
… as well as the spark wire.
15
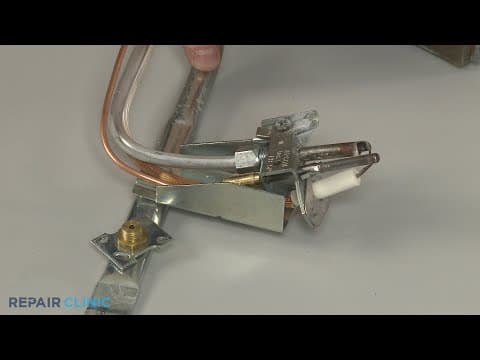
Use the 7/16th inch wrench to unthread the compression nut to detach the pilot gas tube from the gas valve.
16
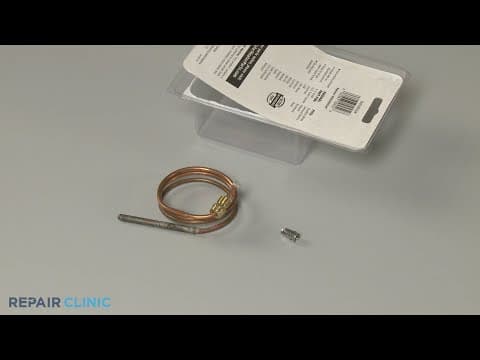
Use the 3/8th inch wrench to unthread the nut to release the thermocouple from the valve.
17
Now use the adjustable wrench to unthread the nut to release the main burner tube from the valve.
18
You can now use the t-pipe to help unthread the old gas valve by rotating it counter-clockwise.
19
To prepare the new gas valve assembly for installation…
20
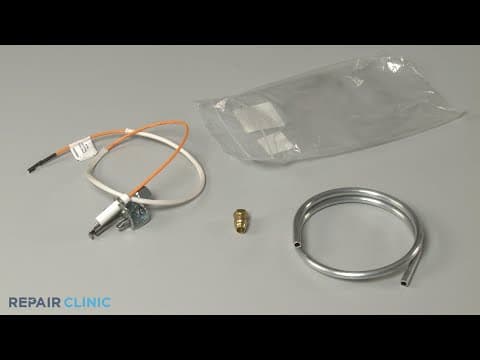
… remove the plugs from the new valve along with the provided pilot tube fitting.
21
Transfer the cover from the old valve to the new one as well.
22
In addition, you will need to transfer the spark igniter.
23
Insert the valve into the tank and rotate clockwise to thread it.
24
Apply thread sealant to the threads of the t-pipe…
25
… then thread the t-pipe into the new gas valve.
26
You can use the t-pipe to help tighten the new gas valve, if necessary.
27
Insert the main burner tube into the valve and thread the nut to secure.
28
Next, insert the thermocouple and tighten the nut.
29
Insert the pilot gas tube and secure with the nut.
30
Attach the spark wire to the spark igniter wire on the valve.
31
Connect the safety thermostat wires to the terminals.
32
Reinstall the burner tube assembly cover.
33
Apply new thread sealant to the threads of the drip leg…
34
… then thread the drip leg into the t-pipe.
35
After applying thread sealant to the gas supply pipe that joins with the t-pipe, thread the pipe into the t-pipe if applicable.
36
Rethread the union to secure the pipes.
37
Now open the water intake valve and allow the tank to refill.
38
Turn the gas supply back on…
39
… and check the reassembled gas pipes for leaks using a soap and water solution.
40
With the burner on, you can check the main burner tube and the pilot tube for leaks.
Description
This video provides step-by-step instructions for replacing the gas valve assembly on AO Smith gas water heaters. The most common reasons for replacing this part is if the burner will not light.
All of the information in this thermostat replacement video is applicable to the following brands: AO Smith
All of the information in this thermostat replacement video is applicable to the following brands: AO Smith
Step-By-Step Instructions
1
To replace the gas valve assembly on this a.o. smith gas water heater…
2
… you will need a pipe wrench, channel-lock pliers, a 7/16th inch wrench, a 3/8th inch wrench, an adjustable wrench, and thread sealant.
3
Before you begin the procedure, shut off the gas supply to the unit.
4
Close the water intake valve as well.
5
Now open the drain valve to drain all of the water from the tank.
6
You can open a hot water faucet in the home to assist in discharging the water.
7
After draining the water, close the drain valve.
8
Use a pipe wrench and channel-lock pliers to help unthread the gas pipe union.
9
Unthread the pipe from the t-pipe, if applicable.
10
Unthread the drip leg from the t-pipe.
11
Partially unthread the t-pipe from the gas valve assembly.
12
Detach the outer burner tube assembly cover.
13
Disconnect the safety thermostat wires…
14
… as well as the spark wire.
15
Use the 7/16th inch wrench to unthread the compression nut to detach the pilot gas tube from the gas valve.
16
Use the 3/8th inch wrench to unthread the nut to release the thermocouple from the valve.
17
Now use the adjustable wrench to unthread the nut to release the main burner tube from the valve.
18
You can now use the t-pipe to help unthread the old gas valve by rotating it counter-clockwise.
19
To prepare the new gas valve assembly for installation…
20
… remove the plugs from the new valve along with the provided pilot tube fitting.
21
Transfer the cover from the old valve to the new one as well.
22
In addition, you will need to transfer the spark igniter.
23
Insert the valve into the tank and rotate clockwise to thread it.
24
Apply thread sealant to the threads of the t-pipe…
25
… then thread the t-pipe into the new gas valve.
26
You can use the t-pipe to help tighten the new gas valve, if necessary.
27
Insert the main burner tube into the valve and thread the nut to secure.
28
Next, insert the thermocouple and tighten the nut.
29
Insert the pilot gas tube and secure with the nut.
30
Attach the spark wire to the spark igniter wire on the valve.
31
Connect the safety thermostat wires to the terminals.
32
Reinstall the burner tube assembly cover.
33
Apply new thread sealant to the threads of the drip leg…
34
… then thread the drip leg into the t-pipe.
35
After applying thread sealant to the gas supply pipe that joins with the t-pipe, thread the pipe into the t-pipe if applicable.
36
Rethread the union to secure the pipes.
37
Now open the water intake valve and allow the tank to refill.
38
Turn the gas supply back on…
39
… and check the reassembled gas pipes for leaks using a soap and water solution.
40
With the burner on, you can check the main burner tube and the pilot tube for leaks.
Applicable Product Model
Parts Needed
Gas Valve Assembly
$302.56
Total$0.00
Related Articles & Videos
04:20
Part Replacement
AO Smith Gas Water Heater Burner Tube Assembly Replacement 100111336
08:36
Part Replacement
AO Smith Gas Water Heater Natural Gas Pilot Assembly Replacement 100111380
07:13
Part Replacement
AO Smith Gas Water Heater 24" Thermocouple Replacement 9000056045




Our Story
Family-owned and operated since 1912, Burke America Parts Group is the longest-running genuine appliance, HVAC, and outdoor power equipment parts solution in North America. At Repair Clinic, we're proud to be an international brand trusted by the pros as well as the DIY community.
About Repair Clinic
© 2026 RepairClinic.com