

Price Match Guarantee

In-stock parts ship the same day

365-Day Return Policy
Price Match GuaranteeGET PRO PRICING
Video & Articles: Appliance & Equipment RepairGE Dishwasher Outer Door Replacement #WD28X27241
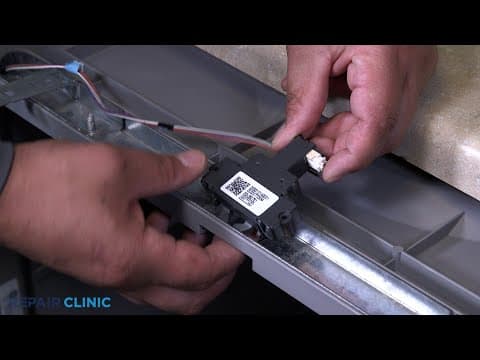
GE Dishwasher Outer Door Replacement #WD28X27241
Skill Level
Total Parts Cost
$217.18Estimated Savings
$112.5011:44
- Description
This video provides step-by-step instructions for replacing the outer door on GE dishwashers. The most common reason for replacing the outer door is if it's dented or broken.
All of the information in this check valve video is applicable to the following brands: GE
All of the information in this check valve video is applicable to the following brands: GE
Step By Step Instructions
1
To replace the outer door in your GE dishwasher…
2
You will need a 1/4” drill driver or nut driver, a 5/16” nut driver bit, channel lock pliers, and a flathead screwdriver.
3
Before you attempt this, be sure to turn off the power to the appliance…
4
…and shut off the water supply valve.
5
Using the drill driver, unthread the two screws securing the toe kick and set it aside.
6
Use channel-lock pliers to unthread the water supply line elbow fitting from the inlet valve…be prepared for some water to spill.
7
Unplug the wire harness and routing clip connected to the door.
8
Next, use a 5/16 drill driver to unthread the screw to release the junction box cover.
9
Note the orientation of the power wires…then untwist the wire nuts to disconnect the wires.
10
Use the flathead screwdriver to unthread the strain relief nut…
11
…and detach the strain relief and power wires from the junction box.
12
Next, disconnect the drain hose from the sink drain or garbage disposer…
13
…and feed it through the cabinet.
14
Unthread the mounting screws securing the dishwasher to the countertop, cabinet, or floor.
15
To move the dishwasher, you may need to adjust the legs to lower the appliance.
16
Now gently pull the dishwasher away from the cabinet.
17
Detach the cable pulleys on both sides of the appliance.
18
Open the dishwasher door and lift off the hinges to remove.
19
Using a 1/4” drill driver, unthread the two screws securing the arm hinges and remove the hinges.
20
Unthread the two 1/4" screws on the inner door.
21
Slide the inner door up to remove it and place aside.
22
Unthread the four 1/4" screws on the bracket support hinges and remove them.
23
To install the new outer door…
24
Place the brackets on the outer door and secure them with the four screws.
25
Align the tabs of the inner door into the outer door grooves and slide down, locking it into place.
26
Rethread the two screws into the inner door.
27
Slide the hinges into place and thread the screws to secure them.
28
Plug in the wire routing clip and wire harness from the door.
29
Set the door back onto the hinges and shut the door.
30
Reattach the cable pulleys on both sides of the appliance.
31
Confirm that the end of the drain hose is accessible through the cabinet wall…
32
…then gently slide the dishwasher back into the cabinet.
33
Adjust the leveling legs if necessary.
34
Rethread the screws to secure the appliance to the countertop, cabinet, or floor.
35
Feed the drain hose through the cabinet…
36
…and connect it to the sink drain or disposer.
37
Make sure the hose is elevated above the connection point.
38
Fully position the wires and strain relief in the junction box…
39
…then thread and tighten the strain relief nut.
40
Join the black wires together, the white wires together, and green wires together. secure them with the wire nuts.
41
With the wires positioned inside the junction box, realign the cover…
42
…and rethread the screw to secure.
43
Reconnect the water supply line fitting to the inlet valve.
44
Set the toe kick into place and secure with the two screws.
45
Turn the water supply back on…
46
…as well as the power…
47
…and your dishwasher should be ready for use.
Description
This video provides step-by-step instructions for replacing the outer door on GE dishwashers. The most common reason for replacing the outer door is if it's dented or broken.
All of the information in this check valve video is applicable to the following brands: GE
All of the information in this check valve video is applicable to the following brands: GE
Step-By-Step Instructions
1
To replace the outer door in your GE dishwasher…
2
You will need a 1/4” drill driver or nut driver, a 5/16” nut driver bit, channel lock pliers, and a flathead screwdriver.
3
Before you attempt this, be sure to turn off the power to the appliance…
4
…and shut off the water supply valve.
5
Using the drill driver, unthread the two screws securing the toe kick and set it aside.
6
Use channel-lock pliers to unthread the water supply line elbow fitting from the inlet valve…be prepared for some water to spill.
7
Unplug the wire harness and routing clip connected to the door.
8
Next, use a 5/16 drill driver to unthread the screw to release the junction box cover.
9
Note the orientation of the power wires…then untwist the wire nuts to disconnect the wires.
10
Use the flathead screwdriver to unthread the strain relief nut…
11
…and detach the strain relief and power wires from the junction box.
12
Next, disconnect the drain hose from the sink drain or garbage disposer…
13
…and feed it through the cabinet.
14
Unthread the mounting screws securing the dishwasher to the countertop, cabinet, or floor.
15
To move the dishwasher, you may need to adjust the legs to lower the appliance.
16
Now gently pull the dishwasher away from the cabinet.
17
Detach the cable pulleys on both sides of the appliance.
18
Open the dishwasher door and lift off the hinges to remove.
19
Using a 1/4” drill driver, unthread the two screws securing the arm hinges and remove the hinges.
20
Unthread the two 1/4" screws on the inner door.
21
Slide the inner door up to remove it and place aside.
22
Unthread the four 1/4" screws on the bracket support hinges and remove them.
23
To install the new outer door…
24
Place the brackets on the outer door and secure them with the four screws.
25
Align the tabs of the inner door into the outer door grooves and slide down, locking it into place.
26
Rethread the two screws into the inner door.
27
Slide the hinges into place and thread the screws to secure them.
28
Plug in the wire routing clip and wire harness from the door.
29
Set the door back onto the hinges and shut the door.
30
Reattach the cable pulleys on both sides of the appliance.
31
Confirm that the end of the drain hose is accessible through the cabinet wall…
32
…then gently slide the dishwasher back into the cabinet.
33
Adjust the leveling legs if necessary.
34
Rethread the screws to secure the appliance to the countertop, cabinet, or floor.
35
Feed the drain hose through the cabinet…
36
…and connect it to the sink drain or disposer.
37
Make sure the hose is elevated above the connection point.
38
Fully position the wires and strain relief in the junction box…
39
…then thread and tighten the strain relief nut.
40
Join the black wires together, the white wires together, and green wires together. secure them with the wire nuts.
41
With the wires positioned inside the junction box, realign the cover…
42
…and rethread the screw to secure.
43
Reconnect the water supply line fitting to the inlet valve.
44
Set the toe kick into place and secure with the two screws.
45
Turn the water supply back on…
46
…as well as the power…
47
…and your dishwasher should be ready for use.
Applicable Product Model

Related Articles & Videos




Our Story
Family-owned and operated since 1912, Burke America Parts Group is the longest-running genuine appliance, HVAC, and outdoor power equipment parts solution in North America. At Repair Clinic, we're proud to be an international brand trusted by the pros as well as the DIY community.
About Repair Clinic
© 2026 RepairClinic.com