


 Price Match Guarantee
Eureka Vacuum Cleaner Dirt cup Parts



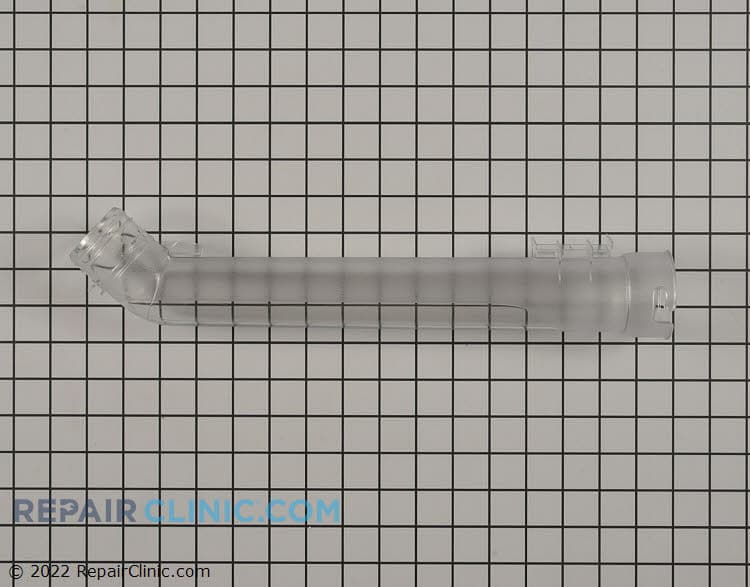
Dirt tube base


Eureka Vacuum Cleaner Dirt Cup Parts
The dirt cup is where your Eureka vacuum collects dust, debris, and pet hair. When the cup seal cracks, the latch breaks, or the filter clogs, suction drops fast. Many Eureka models use the same dirt cup assembly across multiple machines, so finding your exact model number ensures you get a cup that clips on without leaks and seals properly.
Dirt cup failures are one of the easiest vacuum repairs — no tools required on most models. The cup itself, the seal gasket, and the filter are all interchangeable parts that snap together. Replacing a cracked cup or worn seal restores full suction immediately and costs far less than a new vacuum.
- Cracked or damaged dirt cup: Loss of suction, visible cracks in plastic, won't latch securely
- Worn seal gasket: Air leaks around cup, reduced suction, filter gets clogged faster
- Broken cup latch: Cup won't stay attached during emptying, falls off during use
- Clogged filter inside cup: Reduced airflow, motor strains, weak suction
- Missing or damaged cup release button: Can't empty the cup without force
Enter your Eureka model number above to find the exact dirt cup assembly, seal, and filter for your machine. OEM Eureka cups fit without modification and maintain the seal your vacuum needs for peak efficiency.
Find Replacement Eureka Vacuum Cleaner Dirt cup Parts Online by Model or Part Number
Eureka Vacuum Cleaner Dirt Cup Questions
What's the difference between a dirt cup and a dirt bag?
Eureka makes both bagless (dirt cup) and bagged models. Bagless models use a reusable plastic dirt cup that you empty by hand — just twist or press the release, dump the debris, and snap it back on. Bagged models use disposable bags inside the unit. If your Eureka has a visible plastic cup you empty by hand, you need dirt cup parts. Check your manual or model number to confirm which system you have.
Can I use a generic or aftermarket dirt cup instead of OEM?
Generic dirt cups sometimes fit, but OEM Eureka cups are engineered for your specific model's airflow and latching system. Aftermarket cups often have looser seals, which means air bypasses the filter, clogs it faster, and reduces suction. The OEM cup costs slightly more but lasts longer and keeps your Eureka running at full power. For the small price difference, OEM is always the better choice.
How do I know if my dirt cup seal is bad?
A worn seal gasket lets air leak around the cup instead of being pulled through the filter. You'll notice suction drops, the cup feels loose or rattles when installed, or the filter clogs much faster than it should. If the cup snaps in place but suction is weak, the seal is usually the culprit. Replacing just the seal gasket is much cheaper than replacing the whole cup if the cup itself isn't cracked.
How often should I empty my Eureka dirt cup?
Empty it when it reaches the fill line — never let it get completely full, or the filter will clog and suction will suffer. For heavy-use homes (pets, carpeted rooms), you might empty it 2 to 3 times a week. Regular emptying keeps the filter cleaner longer and reduces strain on the motor. If you notice suction dropping after you've just emptied the cup, the filter itself may need cleaning or replacement.
Convenient Online Ordering for Eureka Vacuum Cleaner Dirt Cup Parts
Maintaining your Eureka vacuum cleaner's functionality is simple when you can quickly find and purchase genuine dirt cup parts online. Whether you need a replacement for a damaged cup or a new seal to ensure optimal suction, our online store provides a full range of Eureka vacuum cleaner parts. Utilize our model or part number lookup for an effortless shopping experience. Once ordered, parts ship the same day, ensuring that your vacuum repair is prompt and efficient. We also offer a price match, and you can take advantage of our no-hassle 365-day returns for added peace of mind. To ensure continued vacuum efficiency, clean and inspect the dirt cup regularly, and replace faulty parts promptly. For assistance with installation or repair, browse our Vacuum Cleaner Repair Help section for guides and tips. Visit our page on Eureka Cap Lid Cover Parts for additional repair options.
Eureka Vacuum Cleaner Model Number: Where to Look
On Eureka vacuum cleaners, look for the model number on the rating label along the rear body, underneath the base, or near the floor head. Older canister models may place it on a side panel, while upright models often have a sticker near the cord or handle. Check the label for the model number, not the serial number, then type that model number into the search bar. Use it in the model number search to pull up the parts matched to your entire vacuum. This narrows the catalog to parts made for your Eureka unit, so you can confirm fit quickly and avoid ordering parts based on appearance alone.

Online Repair Library for Eureka Vacuum Cleaner
Repair Clinic's online repair library gives you the tools to diagnose and fix your Eureka Vacuum Cleaner without a service call. Common-symptom articles cover the most likely causes, part testing videos confirm the failed component, and step-by-step written guides walk you through the installation. Use the model number lookup to confirm the exact OEM part, and exploded-view diagrams and wiring illustrations support the more involved jobs.
Related Articles: Vacuum Cleaner Repair

5 Reasons Why Your Vacuum Cleaner Has Lost Its Suction
Find out the five most common causes of lost suction in your vacuum cleaner and how to troubleshoot each from clogged filters and full bags to blockages, fan obstructions, or a failing blower motor.
Three Reasons Why Your Vacuum Cleaner's Motor Isn't Working
Find out three common reasons why your vacuum cleaner motor is not working—seized bearings in the suction or brushroll motor, or damaged motor brushes—and how to check and address each issue.
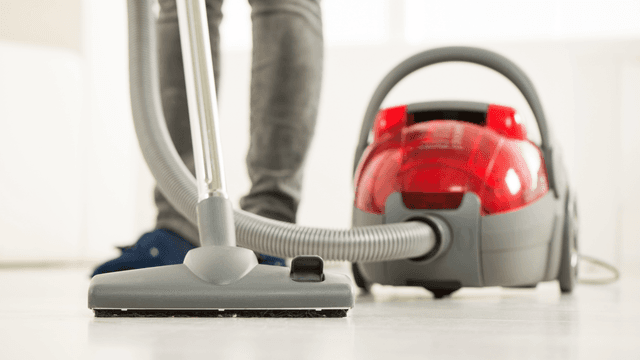
How It Works: Vacuum Cleaner
Learn how a vacuum cleaner creates suction using a motor-driven fan to draw air and debris through filters or bags and into a canister or bag for collection based on fundamental pressure differences and airflow design.




Family-owned and operated since 1912, Burke America Parts Group is the longest-running genuine appliance, HVAC, and outdoor power equipment parts solution in North America. At Repair Clinic, we're proud to be an international brand trusted by the pros as well as the DIY community.
About Repair Clinic