

Price Match Guarantee

In-stock parts ship the same day

365-Day Return Policy
Price Match GuaranteeGET PRO PRICING
Video & Articles: Appliance & Equipment RepairWhirlpool/Kenmore Gas Dryer Drum Roller #W10314173

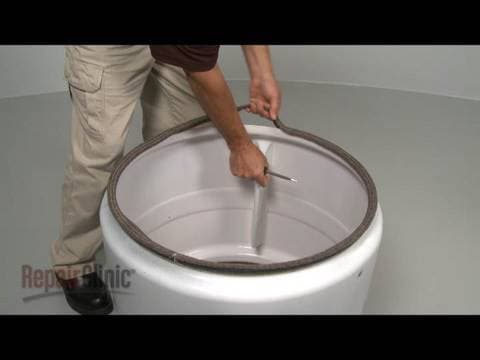
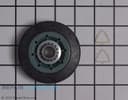
Whirlpool/Kenmore Gas Dryer Drum Roller #W10314173
Skill Level
Total Parts Cost
$22.20Estimated Savings
$112.5003:59
- Description
This video provides step-by-step instructions for replacing a dryer drum support roller on Whirlpool gas dryers. The most common reasons for replacing a support roller are when the dryer makes squeaking noise, stops turning during the cycle, or won’t turn at all.
All of the information in this roller replacement video is applicable to the following brands: Whirlpool, Kenmore, KitchenAid, Maytag, Amana, Crosley, Inglis, Admiral
Tools used: hex socket, flat head screwdriver, Phillips head screwdriver, putty knife
All of the information in this roller replacement video is applicable to the following brands: Whirlpool, Kenmore, KitchenAid, Maytag, Amana, Crosley, Inglis, Admiral
Tools used: hex socket, flat head screwdriver, Phillips head screwdriver, putty knife
Step By Step Instructions
1
As with any repair, be sure you’ve unplugged the appliance before beginning.
2
Your first step is to detach the control panel. Depending on your model, you will either insert a putty knife under the panel to release the two clips or you will pull off both plastic end caps and remove the screws found underneath.
3
Now, rotate the control panel up.
4
Remove the screws securing the main top and slide the top off.
5
Next, insert a flathead screwdriver between the upper and lower front panels to release the two clips and detach the lower panel.
6
Remove the upper panel mounting screws along with the lint screen duct screw and, if applicable, the screw securing the grounding wire.
7
Detach the moisture sensor wire and the two door springs.
8
Now, disconnect the door switch wire connector remove the screws from the top of the upper panel and lift the upper panel off.
9
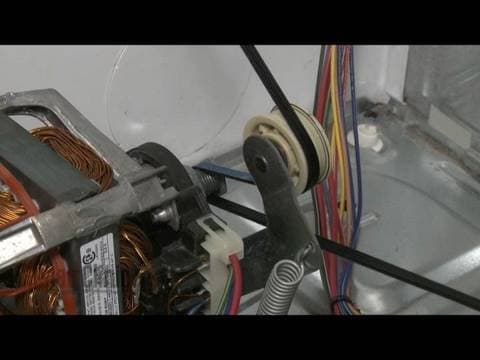
Depress the pulley to release the belt tension and unthread the belt from the pulley and motor shaft.
10
Use the belt to remove the drum.
11
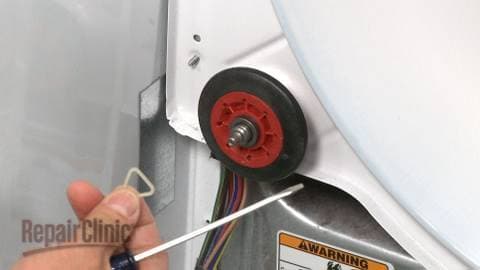
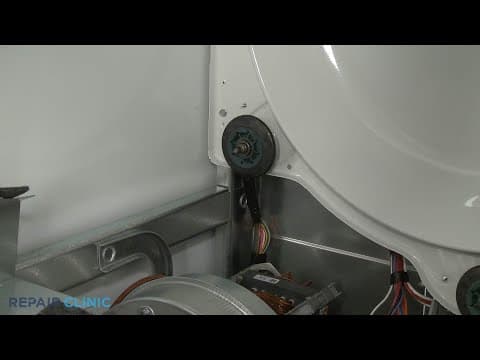
If still intact, remove the old roller by releasing the front tri-ring and sliding the roller off of the shaft.
12
Uninstall the back tri-ring as well.
13
You’re now ready to install the new support roller.
14
Clean the shaft and install the back tri-ring.
15
Slide on the new roller and secure with the front tri-ring.
16
Now, replace the drum by aligning its rim on the two rear rollers and loop the belt around the tension pulley and motor shaft in a “zig-zag” formation.
17
Rotate the drum to help align the belt.
18
Replace the upper front panel by aligning the two rollers on the drum rim and positioning the top lip of the panel on the cabinet brackets.
19
Replace all four panel screws along with the lint screen duct screw and, if applicable, the screw securing the grounding wire.
20
Reattach the moisture sensor wire and the door springs.
21
Now, replace the lower front panel by snapping it into position.
22
Reconnect the door switch wire connector at the top of the dryer.
23
Slide the main top on and secure it with the screws.
24
Rotate the control panel down and lock it into place.
25
If applicable, replace the screws and end caps.
26
You’re now ready to plug the appliance back in to make sure it’s functioning properly.
Description
This video provides step-by-step instructions for replacing a dryer drum support roller on Whirlpool gas dryers. The most common reasons for replacing a support roller are when the dryer makes squeaking noise, stops turning during the cycle, or won’t turn at all.
All of the information in this roller replacement video is applicable to the following brands: Whirlpool, Kenmore, KitchenAid, Maytag, Amana, Crosley, Inglis, Admiral
Tools used: hex socket, flat head screwdriver, Phillips head screwdriver, putty knife
All of the information in this roller replacement video is applicable to the following brands: Whirlpool, Kenmore, KitchenAid, Maytag, Amana, Crosley, Inglis, Admiral
Tools used: hex socket, flat head screwdriver, Phillips head screwdriver, putty knife
Step-By-Step Instructions
1
As with any repair, be sure you’ve unplugged the appliance before beginning.
2
Your first step is to detach the control panel. Depending on your model, you will either insert a putty knife under the panel to release the two clips or you will pull off both plastic end caps and remove the screws found underneath.
3
Now, rotate the control panel up.
4
Remove the screws securing the main top and slide the top off.
5
Next, insert a flathead screwdriver between the upper and lower front panels to release the two clips and detach the lower panel.
6
Remove the upper panel mounting screws along with the lint screen duct screw and, if applicable, the screw securing the grounding wire.
7
Detach the moisture sensor wire and the two door springs.
8
Now, disconnect the door switch wire connector remove the screws from the top of the upper panel and lift the upper panel off.
9
Depress the pulley to release the belt tension and unthread the belt from the pulley and motor shaft.
10
Use the belt to remove the drum.
11
If still intact, remove the old roller by releasing the front tri-ring and sliding the roller off of the shaft.
12
Uninstall the back tri-ring as well.
13
You’re now ready to install the new support roller.
14
Clean the shaft and install the back tri-ring.
15
Slide on the new roller and secure with the front tri-ring.
16
Now, replace the drum by aligning its rim on the two rear rollers and loop the belt around the tension pulley and motor shaft in a “zig-zag” formation.
17
Rotate the drum to help align the belt.
18
Replace the upper front panel by aligning the two rollers on the drum rim and positioning the top lip of the panel on the cabinet brackets.
19
Replace all four panel screws along with the lint screen duct screw and, if applicable, the screw securing the grounding wire.
20
Reattach the moisture sensor wire and the door springs.
21
Now, replace the lower front panel by snapping it into position.
22
Reconnect the door switch wire connector at the top of the dryer.
23
Slide the main top on and secure it with the screws.
24
Rotate the control panel down and lock it into place.
25
If applicable, replace the screws and end caps.
26
You’re now ready to plug the appliance back in to make sure it’s functioning properly.
Applicable Product Model
Related Articles & Videos
07:02
Part Replacement
Whirlpool Electric Washer/Dryer Combo Drum Roller Replacement #WPW10314173




Our Story
Family-owned and operated since 1912, Burke America Parts Group is the longest-running genuine appliance, HVAC, and outdoor power equipment parts solution in North America. At Repair Clinic, we're proud to be an international brand trusted by the pros as well as the DIY community.
About Repair Clinic
© 2026 RepairClinic.com