

Price Match Guarantee

In-stock parts ship the same day

365-Day Return Policy
Price Match GuaranteeGET PRO PRICING
Video & Articles: Appliance & Equipment RepairKitchenAid Dishwasher Check Valve Replacement #675238

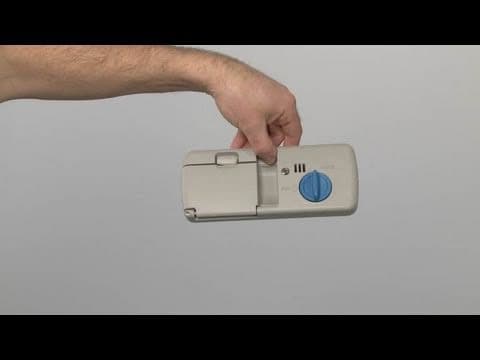
KitchenAid Dishwasher Check Valve Replacement #675238
Skill Level
Total Parts Cost
$49.50Estimated Savings
$112.5001:45
- Description
This video provides step-by-step instructions for replacing the check valve on KitchenAid dishwashers with model prefix 665. The most common reason for replacing the check valve is when the dishwasher is not draining.
All of the information in this check valve replacement video is applicable to the following brands: Whirlpool, Kenmore, KitchenAid, Estate, Roper, Inglis, Maytag, Crosley
Tools used: Phillips head screwdriver, pliers
All of the information in this check valve replacement video is applicable to the following brands: Whirlpool, Kenmore, KitchenAid, Estate, Roper, Inglis, Maytag, Crosley
Tools used: Phillips head screwdriver, pliers
Step By Step Instructions
1
Before you begin, be sure to turn off the power supply to your dishwasher.
2
Your first step is to remove the screws to release the lower access panels.
3
Next, use pliers to squeeze the clamp to release the drain hose from the old check valve.
4
Be prepared for some water to spill out.
5
Now, unscrew the old check valve.
6
Install the new check valve by screwing it into the pump housing.
7
Replace the drain hose and secure it with the clamp.
8
Restore power to your dishwasher and check for leaks.
9
If no leaks are visible, replace the lower access panels and secure the screws.
Description
This video provides step-by-step instructions for replacing the check valve on KitchenAid dishwashers with model prefix 665. The most common reason for replacing the check valve is when the dishwasher is not draining.
All of the information in this check valve replacement video is applicable to the following brands: Whirlpool, Kenmore, KitchenAid, Estate, Roper, Inglis, Maytag, Crosley
Tools used: Phillips head screwdriver, pliers
All of the information in this check valve replacement video is applicable to the following brands: Whirlpool, Kenmore, KitchenAid, Estate, Roper, Inglis, Maytag, Crosley
Tools used: Phillips head screwdriver, pliers
Step-By-Step Instructions
1
Before you begin, be sure to turn off the power supply to your dishwasher.
2
Your first step is to remove the screws to release the lower access panels.
3
Next, use pliers to squeeze the clamp to release the drain hose from the old check valve.
4
Be prepared for some water to spill out.
5
Now, unscrew the old check valve.
6
Install the new check valve by screwing it into the pump housing.
7
Replace the drain hose and secure it with the clamp.
8
Restore power to your dishwasher and check for leaks.
9
If no leaks are visible, replace the lower access panels and secure the screws.
Applicable Product Model
Related Articles & Videos




Our Story
Family-owned and operated since 1912, Burke America Parts Group is the longest-running genuine appliance, HVAC, and outdoor power equipment parts solution in North America. At Repair Clinic, we're proud to be an international brand trusted by the pros as well as the DIY community.
About Repair Clinic
© 2026 RepairClinic.com