

Price Match Guarantee

In-stock parts ship the same day

365-Day Return Policy
Price Match GuaranteeGET PRO PRICING
Video & Articles: Appliance & Equipment RepairWhirlpool Electric Dryer Drum Roller Axle, Front #WPW10359271


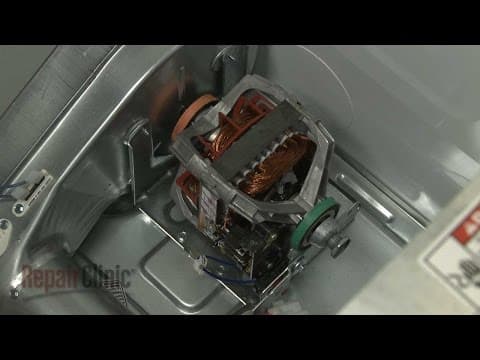
Whirlpool Electric Dryer Drum Roller Axle, Front #WPW10359271
Skill Level
Total Parts Cost
$51.57Estimated Savings
$112.5008:48
- Description
This video provides step-by-step repair instructions for replacing the drum roller axle on a Whirlpool electric dryer. The most common reasons for replacing the axle are if the dryer won’t spin or is unusually noisy.
This drum roller axle replacement video is applicable to the following brands:
Whirlpool, Admiral, Amana, Crosley, Inglis, Kenmore, KitchenAid, Maytag
Tools needed: 5/16th inch socket or nut driver, quarter-inch socket or nut driver, small flat-head screwdriver, Channel-lock pliers, 9/16th inch socket
Don't forget to like and comment on this video and subscribe to our channel!
This drum roller axle replacement video is applicable to the following brands:
Whirlpool, Admiral, Amana, Crosley, Inglis, Kenmore, KitchenAid, Maytag
Tools needed: 5/16th inch socket or nut driver, quarter-inch socket or nut driver, small flat-head screwdriver, Channel-lock pliers, 9/16th inch socket
Don't forget to like and comment on this video and subscribe to our channel!
Step By Step Instructions
1
Before you replace a front drum roller axle in your dryer be sure to unplug the power cord.
2
Use a 5/16th inch socket or nut driver to unthread the rear screws securing the top panel.
3
Slide the top panel back and lift up to detach.
4
Use a quarter-inch socket or nut driver to unthread the control panel housing mounting screws.
5
Disconnect the control panel wire connecter from the main control board.
6
Lift up the tabs to detach the housing.
7
Disconnect the door switch wire connecter.
8
Now lift up the front of the dryer and support it then use the quarter-inch socket or nut driver to remove the four lower mounting screws securing the front panel.
9
Remove the support and lower the appliance.
10
Open the dryer door and use a phillips-head screwdriver to unthread the screws securing the front panel to the bulkhead.
11
Using the quarter-inch socket or nut driver, unthread the upper mounting screws.
12
You can now lift the front panel up to detach it from the cabinet.
13
Use the quarter-inch socket or nut driver to unthread the screw securing the control board support bracket.
14
Use wire or string to secure the support
15
Next, remove the screws securing the front support brace.
16
Detach the brace.
17
Unthread the screw to release the lower support bracket.
18
Remove the front bulkhead mounting screws.
19
Disconnect the sensor wire connecter.
20
You can now remove the front bulkhead.
21
To replace the left side roller axle, use a small flat-head screwdriver to carefully detach the outer tri-ring.
22
Remove the roller as well as the inner tri-ring.
23
Now use channel-lock pliers to secure the roller axle and a 9/16th inch socket to unthread the nut securing the axle.
24
Remove the old axle.
25
Install the new roller axle by sliding on the washer and inserting the threaded end through the rear of the bulkhead.
26
Thread the nut then secure the axle end with pliers and tighten the nut with the socket.
27
Slide on the inner tri-ring.
28
Replace the roller and secure it with the outer tri-ring.
29
If you need to replace the right side roller axle first remove the lint filter then unthread the screws to release the lower duct assembly.
30
You can now replace the right side axle in the same manner as the left side one.
31
With the new axle in place, reposition the duct assembly and secure it with the screws.
32
Replace the lint filter.
33
Reposition the front bulkhead on the drum then hook it onto the cabinet tabs.
34
Reconnect the sensor wire connecter and rethread the mounting screws to secure the bulkhead.
35
Realign the lower support bracket and secure it with the screw.
36
Reposition the front support brace.
37
Rethread the screws.
38
Align the control board support bracket and replace the screw.
39
Reinstall the front panel by first feeding the door switch wire harness under the support brace then align the panel on the cabinet tabs.
40
Rethread the upper mounting screws.
41
Support the front of the dryer to replace the lower screws.
42
Secure the two screws behind the door as well.
43
Connect the door switch wire connecter.
44
Insert the control panel housing tabs into the slots in the front panel and snap the housing into place.
45
Rethread the mounting screws.
46
Connect the wire connecter to the main control board.
47
Realign the top panel and slide it into position.
48
Secure the screws.
49
With the repair completed plug the power cord back in and your dryer should be ready for use.
Description
This video provides step-by-step repair instructions for replacing the drum roller axle on a Whirlpool electric dryer. The most common reasons for replacing the axle are if the dryer won’t spin or is unusually noisy.
This drum roller axle replacement video is applicable to the following brands:
Whirlpool, Admiral, Amana, Crosley, Inglis, Kenmore, KitchenAid, Maytag
Tools needed: 5/16th inch socket or nut driver, quarter-inch socket or nut driver, small flat-head screwdriver, Channel-lock pliers, 9/16th inch socket
Don't forget to like and comment on this video and subscribe to our channel!
This drum roller axle replacement video is applicable to the following brands:
Whirlpool, Admiral, Amana, Crosley, Inglis, Kenmore, KitchenAid, Maytag
Tools needed: 5/16th inch socket or nut driver, quarter-inch socket or nut driver, small flat-head screwdriver, Channel-lock pliers, 9/16th inch socket
Don't forget to like and comment on this video and subscribe to our channel!
Step-By-Step Instructions
1
Before you replace a front drum roller axle in your dryer be sure to unplug the power cord.
2
Use a 5/16th inch socket or nut driver to unthread the rear screws securing the top panel.
3
Slide the top panel back and lift up to detach.
4
Use a quarter-inch socket or nut driver to unthread the control panel housing mounting screws.
5
Disconnect the control panel wire connecter from the main control board.
6
Lift up the tabs to detach the housing.
7
Disconnect the door switch wire connecter.
8
Now lift up the front of the dryer and support it then use the quarter-inch socket or nut driver to remove the four lower mounting screws securing the front panel.
9
Remove the support and lower the appliance.
10
Open the dryer door and use a phillips-head screwdriver to unthread the screws securing the front panel to the bulkhead.
11
Using the quarter-inch socket or nut driver, unthread the upper mounting screws.
12
You can now lift the front panel up to detach it from the cabinet.
13
Use the quarter-inch socket or nut driver to unthread the screw securing the control board support bracket.
14
Use wire or string to secure the support
15
Next, remove the screws securing the front support brace.
16
Detach the brace.
17
Unthread the screw to release the lower support bracket.
18
Remove the front bulkhead mounting screws.
19
Disconnect the sensor wire connecter.
20
You can now remove the front bulkhead.
21
To replace the left side roller axle, use a small flat-head screwdriver to carefully detach the outer tri-ring.
22
Remove the roller as well as the inner tri-ring.
23
Now use channel-lock pliers to secure the roller axle and a 9/16th inch socket to unthread the nut securing the axle.
24
Remove the old axle.
25
Install the new roller axle by sliding on the washer and inserting the threaded end through the rear of the bulkhead.
26
Thread the nut then secure the axle end with pliers and tighten the nut with the socket.
27
Slide on the inner tri-ring.
28
Replace the roller and secure it with the outer tri-ring.
29
If you need to replace the right side roller axle first remove the lint filter then unthread the screws to release the lower duct assembly.
30
You can now replace the right side axle in the same manner as the left side one.
31
With the new axle in place, reposition the duct assembly and secure it with the screws.
32
Replace the lint filter.
33
Reposition the front bulkhead on the drum then hook it onto the cabinet tabs.
34
Reconnect the sensor wire connecter and rethread the mounting screws to secure the bulkhead.
35
Realign the lower support bracket and secure it with the screw.
36
Reposition the front support brace.
37
Rethread the screws.
38
Align the control board support bracket and replace the screw.
39
Reinstall the front panel by first feeding the door switch wire harness under the support brace then align the panel on the cabinet tabs.
40
Rethread the upper mounting screws.
41
Support the front of the dryer to replace the lower screws.
42
Secure the two screws behind the door as well.
43
Connect the door switch wire connecter.
44
Insert the control panel housing tabs into the slots in the front panel and snap the housing into place.
45
Rethread the mounting screws.
46
Connect the wire connecter to the main control board.
47
Realign the top panel and slide it into position.
48
Secure the screws.
49
With the repair completed plug the power cord back in and your dryer should be ready for use.
Applicable Product Model
Parts Needed
Drum Roller Axle
$51.57
Total$0.00
Related Articles & Videos




Our Story
Family-owned and operated since 1912, Burke America Parts Group is the longest-running genuine appliance, HVAC, and outdoor power equipment parts solution in North America. At Repair Clinic, we're proud to be an international brand trusted by the pros as well as the DIY community.
About Repair Clinic
© 2026 RepairClinic.com