

Price Match Guarantee

In-stock parts ship the same day

365-Day Return Policy
Price Match GuaranteeGET PRO PRICING
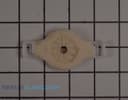
Video & Articles: Appliance & Equipment RepairRear Fan Motor Grommet (part 242287501) - Frigidaire Refrigerator Repair

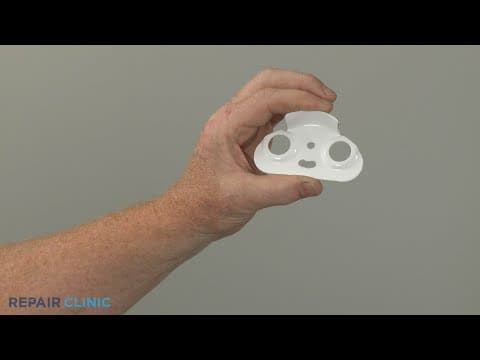
Rear Fan Motor Grommet (part 242287501) - Frigidaire Refrigerator Repair
Skill Level
Total Parts Cost
$14.74Estimated Savings
$112.5003:58
- Description
This video provides step-by-step repair instructions for replacing the rear motor grommet on a Frigidaire refrigerator (Model FFTR1814TW8). The most common reason for replacing the rear motor grommet is when the grommet has broken or has become brittle.
All of the information for this refrigerator rear motor grommet replacement video is applicable to the following brands:
Frigidaire, White Westinghouse, Kelvinator, Gibson, Kenmore, Tappan, & Electrolux.
Tools used: Small flat-head screwdriver, needle-nose pliers, & quarter-inch socket or nut driver.
All of the information for this refrigerator rear motor grommet replacement video is applicable to the following brands:
Frigidaire, White Westinghouse, Kelvinator, Gibson, Kenmore, Tappan, & Electrolux.
Tools used: Small flat-head screwdriver, needle-nose pliers, & quarter-inch socket or nut driver.
Step By Step Instructions
1
Frigidaire Refrigerator - FFTR1814TW8
2
Refrigerator Rear Evaporator Fan Motor Grommet Replacement
3
Heavy, Sharp, Shock, Water
4
unplug the power cord
5
Shock
6
remove the ice bin if applicable
7
lift off the freezer rack stop then slide the rack to the left to remove
8
if you do not have an ice maker in the freezer, use a small flat-head screwdriver to depress the tab to release the ice maker connection cover from the evaporator cover and use needle-nose pliers to detach the wire connector
9
if you do have an ice maker, use a quarter-inch socket or nut driver to loosen the two mounting screws then lift the ice maker off the screws
10
lift the ice make off of the screws
11
detach the connector cover and disconnect the wire connector
12
detach the wire connector from the evaporator cover
13
unthread the two screws securing the cover
14
Heavy
15
pull the cover forward from the top and detach the grounding wire, disconnect the evaporator fan motor, and fully remove the cover
16
detach the grounding wire then disconnect the evaporator fan motor wire connector and fully remove the cover
17
if still intact, rotate the old rear motor retaining grommet counter-clockwise to remove
18
align the new retaining grommet on the housing then rotate it clockwise to lock it into place
19
reinstall the evaporator cover by connecting the evaporator fan motor wire connecter
20
attach the grounding wire and align the bottom edge of the cover in the groove
21
insert the ice maker wire connector through the hole in the cover as you fully reposition the cover
22
if applicable, reinstall the ice maker otherwise snap on the ice maker connection cover
23
position the ice maker on the fill tube and the mounting screws and tighten the screws
24
snap on the ice maker cover, replace the rack, and snap the rack stop into place
25
replace the ice bin if applicable
26
Shock
27
plug the power cord back in
Description
This video provides step-by-step repair instructions for replacing the rear motor grommet on a Frigidaire refrigerator (Model FFTR1814TW8). The most common reason for replacing the rear motor grommet is when the grommet has broken or has become brittle.
All of the information for this refrigerator rear motor grommet replacement video is applicable to the following brands:
Frigidaire, White Westinghouse, Kelvinator, Gibson, Kenmore, Tappan, & Electrolux.
Tools used: Small flat-head screwdriver, needle-nose pliers, & quarter-inch socket or nut driver.
All of the information for this refrigerator rear motor grommet replacement video is applicable to the following brands:
Frigidaire, White Westinghouse, Kelvinator, Gibson, Kenmore, Tappan, & Electrolux.
Tools used: Small flat-head screwdriver, needle-nose pliers, & quarter-inch socket or nut driver.
Step-By-Step Instructions
1
Frigidaire Refrigerator - FFTR1814TW8
2
Refrigerator Rear Evaporator Fan Motor Grommet Replacement
3
Heavy, Sharp, Shock, Water
4
unplug the power cord
5
Shock
6
remove the ice bin if applicable
7
lift off the freezer rack stop then slide the rack to the left to remove
8
if you do not have an ice maker in the freezer, use a small flat-head screwdriver to depress the tab to release the ice maker connection cover from the evaporator cover and use needle-nose pliers to detach the wire connector
9
if you do have an ice maker, use a quarter-inch socket or nut driver to loosen the two mounting screws then lift the ice maker off the screws
10
lift the ice make off of the screws
11
detach the connector cover and disconnect the wire connector
12
detach the wire connector from the evaporator cover
13
unthread the two screws securing the cover
14
Heavy
15
pull the cover forward from the top and detach the grounding wire, disconnect the evaporator fan motor, and fully remove the cover
16
detach the grounding wire then disconnect the evaporator fan motor wire connector and fully remove the cover
17
if still intact, rotate the old rear motor retaining grommet counter-clockwise to remove
18
align the new retaining grommet on the housing then rotate it clockwise to lock it into place
19
reinstall the evaporator cover by connecting the evaporator fan motor wire connecter
20
attach the grounding wire and align the bottom edge of the cover in the groove
21
insert the ice maker wire connector through the hole in the cover as you fully reposition the cover
22
if applicable, reinstall the ice maker otherwise snap on the ice maker connection cover
23
position the ice maker on the fill tube and the mounting screws and tighten the screws
24
snap on the ice maker cover, replace the rack, and snap the rack stop into place
25
replace the ice bin if applicable
26
Shock
27
plug the power cord back in
Applicable Product Model
Parts Needed
Grommet
$14.74
Total$0.00
Related Articles & Videos
03:10
Part Replacement
Start Relay Replacement (part 241941007) - Frigidaire Refrigerator Repair
05:34
Part Replacement
Evaporator Fan Motor Replacement (part 242077705) - Frigidaire Refrigerator Repair
02:21
Part Replacement
Refrigerator Door Stop (part 240312421) - Frigidaire Refrigerator Repair
02:29
Part Replacement
Condenser Fan Blade (part 241639502) - Frigidaire Refrigerator Repair




Our Story
Family-owned and operated since 1912, Burke America Parts Group is the longest-running genuine appliance, HVAC, and outdoor power equipment parts solution in North America. At Repair Clinic, we're proud to be an international brand trusted by the pros as well as the DIY community.
About Repair Clinic
© 2026 RepairClinic.com