

Price Match Guarantee

In-stock parts ship the same day

365-Day Return Policy
Price Match GuaranteeGET PRO PRICING
Video & Articles: Appliance & Equipment RepairElectrolux Front-Load Washer Drain Hose Replacement (part 137629206)
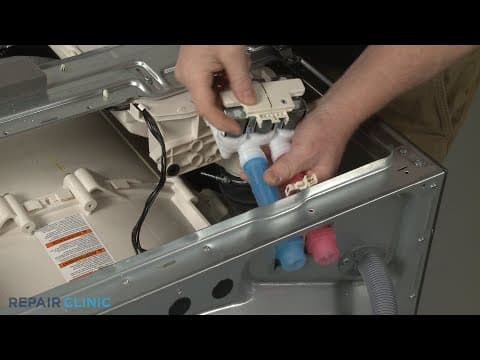
Electrolux Front-Load Washer Drain Hose Replacement (part 137629206)
Skill Level
Total Parts Cost
$53.94Estimated Savings
$112.5009:41
- Description
This video provides step-by-step instructions for replacing the drain hose on Electrolux washing machine. The most common reason for replacing the drain hose is when the washing machine is leaking water.
All of the information in this drain hose replacement video is applicable to the following brands: Electrolux
Tools used: Phillips-head screwdriver or Number two square drive bit, & needle-nose pliers.
All of the information in this drain hose replacement video is applicable to the following brands: Electrolux
Tools used: Phillips-head screwdriver or Number two square drive bit, & needle-nose pliers.
Step By Step Instructions
1
Electrolux Front-Load Washer - Model EFLS627UTT
2
Front-Load Washer Drain Hose Replacement
3
Tools & Assistance Needed
4
"You will need a Philips-head screwdriver (or a number two square drive bit), needle-nose pliers and a T-20 Torx bit for this procedure, and you may need assistance."
5
Be sure to unplug the power cord.
6
Be sure to shut off the water supply.
7
Remove the hot-and-cold water supply lines from the inlet valve ports – be prepared for some water to spill out.
8
Have an assistant help you to move the appliance away from the wall.
9
"Using a Philips-head screwdriver or a number two square drive bit, unthread the rear screws securing the top panel."
10
Remove the panel.
11
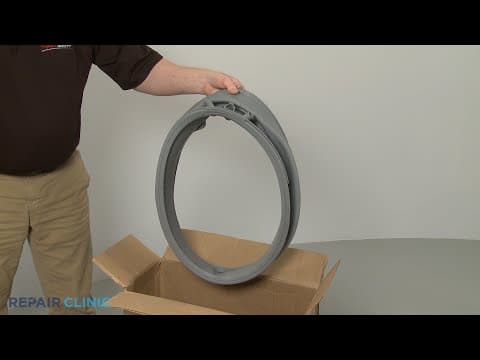
Use needle-nose pliers to help extend the spring to remove the retainer from the door boot seal.
12
Peel the boot seal off the lip of the front panel.
13
Lift and support the front of the washer.
14
Unthread the four screws securing the bottom of the front panel.
15
Pull out the dispenser drawer and depress the tab to fully release.
16
Unthread the two larger screws inside the dispenser drawer housing.
17
Unthread the three screws securing the top of the front panel.
18
Lift the front panel up and out to detach.
19
Disconnect the two wire connecters to fully remove the panel.
20
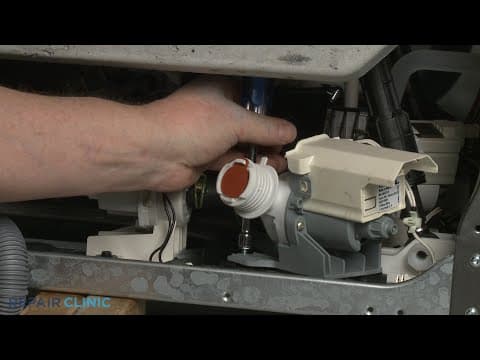
Use pliers to release the spring clamp so you can detach the drain hose from the drain pump.
21
Detach the front hose retainer from the base.
22
Support the left side of the washer then detach the two left side hose retainers from the base.
23
Remove the support.
24
Use a T-20 Torx bit to unthread all of the screws securing the rear panel.
25
Use a Philips-head screwdriver to unthread the screw securing the panel to the motor control board housing.
26
"Using the Philips-head screwdriver or number two square drive bit, unthread the screw to release the power cord grounding wire."
27
Depress the tab to disconnect the power cord wire connecter.
28
Unthread the screws securing the vibration damper.
29
Heavy Hazard
30
"Set the damper aside, then unthread the screw securing the drain hose mounting flange."
31
Remove the flange.
32
Slide the retaining disc off of the drain hose.
33
"Fully remove the rear panel, then release the drain hose from the rear retainers and fully remove the old hose."
34
Install the new drain hose by feeding the curved end through the rear of the washer cabinet to the front.
35
Secure the hose in the two rear retainers.
36
Feed the hose through the hole in the rear panel.
37
"Reposition the panel on the frame, then thread the screws to secure."
38
Connect the power cord wire connecter and secure the grounding wire to the panel with the screw.
39
Realign the drain hose flange and thread the screw to secure.
40
Slide the retaining disc onto the end of the hose.
41
Reinstall the vibration damper.
42
"Returning to the front of the appliance, snap the two left side hose retainers into the base, along with the front retainer."
43
"Slide the spring clamp onto the end of the hose, attach the hose to the drain pump, and secure it with the clamp."
44
Support the front of the appliance to reinstall the front panel by first connecting the control board wire connecter and the door latch wire connecter.
45
Align the panel on the mounting pins and push down.
46
"Rethread the three screws on top, then replace the screws in the dispenser drawer housing."
47
Reinstall the dispenser drawer.
48
Rethread the four screws to secure the bottom of the front panel.
49
Remove the support and realign the door boot seal on the lip of the front panel.
50
Secure it with the retainer by aligning the spring at the top then insert it into the groove of the boot seal.
51
Realign the top panel and secure it with the screws at the rear.
52
Move the appliance back against the wall and attach the hot-and-cold water supply lines to the inlet valve ports.
53
Turn the water supply back on and plug the power cord back in.
54
Congrats! Your front-load washer is ready for use.
Description
This video provides step-by-step instructions for replacing the drain hose on Electrolux washing machine. The most common reason for replacing the drain hose is when the washing machine is leaking water.
All of the information in this drain hose replacement video is applicable to the following brands: Electrolux
Tools used: Phillips-head screwdriver or Number two square drive bit, & needle-nose pliers.
All of the information in this drain hose replacement video is applicable to the following brands: Electrolux
Tools used: Phillips-head screwdriver or Number two square drive bit, & needle-nose pliers.
Step-By-Step Instructions
1
Electrolux Front-Load Washer - Model EFLS627UTT
2
Front-Load Washer Drain Hose Replacement
3
Tools & Assistance Needed
4
"You will need a Philips-head screwdriver (or a number two square drive bit), needle-nose pliers and a T-20 Torx bit for this procedure, and you may need assistance."
5
Be sure to unplug the power cord.
6
Be sure to shut off the water supply.
7
Remove the hot-and-cold water supply lines from the inlet valve ports – be prepared for some water to spill out.
8
Have an assistant help you to move the appliance away from the wall.
9
"Using a Philips-head screwdriver or a number two square drive bit, unthread the rear screws securing the top panel."
10
Remove the panel.
11
Use needle-nose pliers to help extend the spring to remove the retainer from the door boot seal.
12
Peel the boot seal off the lip of the front panel.
13
Lift and support the front of the washer.
14
Unthread the four screws securing the bottom of the front panel.
15
Pull out the dispenser drawer and depress the tab to fully release.
16
Unthread the two larger screws inside the dispenser drawer housing.
17
Unthread the three screws securing the top of the front panel.
18
Lift the front panel up and out to detach.
19
Disconnect the two wire connecters to fully remove the panel.
20
Use pliers to release the spring clamp so you can detach the drain hose from the drain pump.
21
Detach the front hose retainer from the base.
22
Support the left side of the washer then detach the two left side hose retainers from the base.
23
Remove the support.
24
Use a T-20 Torx bit to unthread all of the screws securing the rear panel.
25
Use a Philips-head screwdriver to unthread the screw securing the panel to the motor control board housing.
26
"Using the Philips-head screwdriver or number two square drive bit, unthread the screw to release the power cord grounding wire."
27
Depress the tab to disconnect the power cord wire connecter.
28
Unthread the screws securing the vibration damper.
29
Heavy Hazard
30
"Set the damper aside, then unthread the screw securing the drain hose mounting flange."
31
Remove the flange.
32
Slide the retaining disc off of the drain hose.
33
"Fully remove the rear panel, then release the drain hose from the rear retainers and fully remove the old hose."
34
Install the new drain hose by feeding the curved end through the rear of the washer cabinet to the front.
35
Secure the hose in the two rear retainers.
36
Feed the hose through the hole in the rear panel.
37
"Reposition the panel on the frame, then thread the screws to secure."
38
Connect the power cord wire connecter and secure the grounding wire to the panel with the screw.
39
Realign the drain hose flange and thread the screw to secure.
40
Slide the retaining disc onto the end of the hose.
41
Reinstall the vibration damper.
42
"Returning to the front of the appliance, snap the two left side hose retainers into the base, along with the front retainer."
43
"Slide the spring clamp onto the end of the hose, attach the hose to the drain pump, and secure it with the clamp."
44
Support the front of the appliance to reinstall the front panel by first connecting the control board wire connecter and the door latch wire connecter.
45
Align the panel on the mounting pins and push down.
46
"Rethread the three screws on top, then replace the screws in the dispenser drawer housing."
47
Reinstall the dispenser drawer.
48
Rethread the four screws to secure the bottom of the front panel.
49
Remove the support and realign the door boot seal on the lip of the front panel.
50
Secure it with the retainer by aligning the spring at the top then insert it into the groove of the boot seal.
51
Realign the top panel and secure it with the screws at the rear.
52
Move the appliance back against the wall and attach the hot-and-cold water supply lines to the inlet valve ports.
53
Turn the water supply back on and plug the power cord back in.
54
Congrats! Your front-load washer is ready for use.
Applicable Product Model

Related Articles & Videos
07:53
Part Replacement
Electrolux Front-Load Washer Door Boot Seal Replacement (part 5304505004)
08:08
Part Replacement
Electrolux Front-Load Washer Sump Filter Replacement (part 5304505165)
06:59
Part Replacement
Electrolux Front-Load Washer Drain Pump Assembly Replacement (part 5304514775)
04:11
Part Replacement
Electrolux Front-Load Washer Water Valve Assembly Replacement (part 5304514790)




Our Story
Family-owned and operated since 1912, Burke America Parts Group is the longest-running genuine appliance, HVAC, and outdoor power equipment parts solution in North America. At Repair Clinic, we're proud to be an international brand trusted by the pros as well as the DIY community.
About Repair Clinic
© 2026 RepairClinic.com