

Price Match Guarantee

In-stock parts ship the same day

365-Day Return Policy
Price Match GuaranteeGET PRO PRICING
Video & Articles: Appliance & Equipment RepairHonda Pressure Washer Engine Timing Belt #14400-Z0J-014


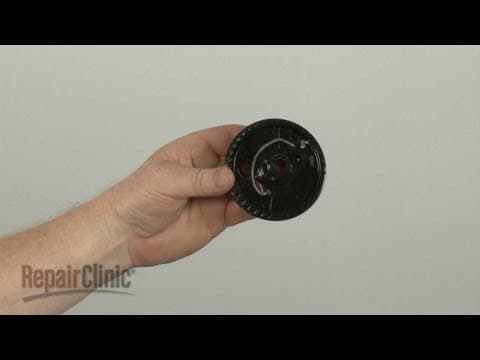
Honda Pressure Washer Engine Timing Belt #14400-Z0J-014
Skill Level
Total Parts Cost
$12.35Estimated Savings
$112.5010:03
- Description
This video provides step-by-step repair instructions for replacing the timing belt (or cogged belt) on a Honda small engine. The most common reasons for replacing the timing belt are when the engine won't run or runs poorly.
All of the information for this timing belt replacement video is applicable to the following brands:
Honda, Lawn Boy, Toro, MTD, Cub Cadet
Tools needed: 10mm socket and socket wrench, pinch off pliers, pliers, 12mm socket, flat blade screwdriver, 13/16 spark plug wrench, 10mm wrench, torque wrench, safety razor, needle nose pliers, ½ in wrench, Hondabond
Step By Step Instructions
1
Before you replace the timing belt first make sure the engine has cooled.
2
Next, you should remove the wire and boot from the spark plug to prevent the engine from accidentally starting.
3
We recommend performing this procedure with no fuel in the tank and no oil in the engine.
4
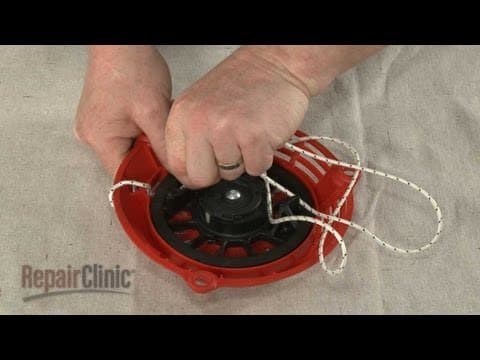
Now remove the nuts securing the recoil starter to the engine and pull the starter off.
5
Use locking pliers to crimp the fuel line then release the retaining clamp and detach the fuel line from the shut-off valve.
6
You can now remove the engine cover and tank.
7
Disconnect the high pressure hose from the pump.
8
Use locking pliers to crimp the detergent solution tube and detach the tube from the chemical injector.
9
Now remove the nuts and bolts securing the engine and pump to the mounting plate.
10
Remove the pump.
11
Remove the pump drive key from the crankshaft.
12
Now carefully lift the engine off of the mounting plate and set it on a sturdy surface with the valve cover facing upward.
13
Use a 10mm socket to remove the bolts securing the valve cover.
14
Pry the cover off – be prepared for some oil to spill.
15
Use a socket or a spark plug wrench to help remove the spark plug.
16
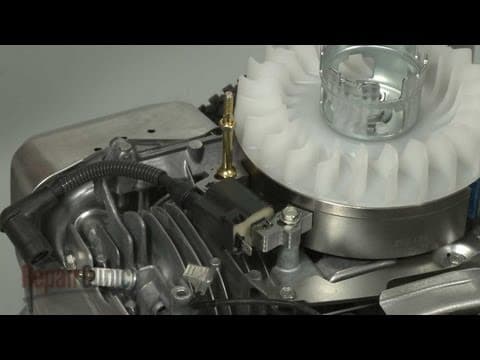
Confirm that the piston is in the “up” position and that the flywheel magnets are aligned with the ignition coil.
17
Next, use a flathead screwdriver to slide the belt off of the timing cam.
18
Use a small flathead screwdriver to push out the pin securing the timing cam and remove the cam.
19
Now note the position of the governor spring in the governor arm then detach it from the arm and bracket.
20
Next, loosen the nut securing the governor arm and pull the arm free.
21
Detach the arm from the rod and spring.
22
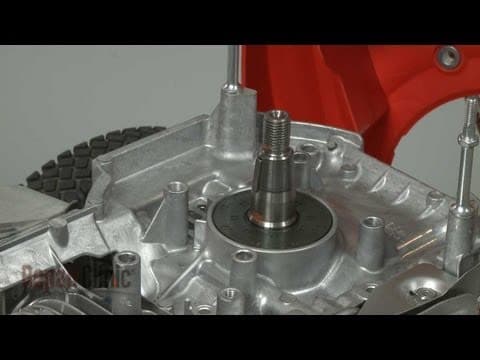
Now rotate the engine so the crankshaft faces upward.
23
Remove the bolts securing the two halves of the engine housing together.
24
With the bolts removed, pry the engine housing apart.
25
This will require significant effort and you should be prepared for oil to spill.
26
If still intact, remove the old belt.
27
Use a razor to scrape off the old seal.
28
Clean the surface of both halves of the engine housing.
29
You’re now ready to install the new timing belt.
30
Loop the belt onto the crankshaft.
31
Make sure the belt is accessible through the valve opening insert the timing command secure it with the pin to hold the belt in place.
32
Apply sealant to the sealing surface of the engine housing.
33
Join the two halves of the housing together.
34
Secure the housing with the bolts.
35
Tighten the bolts in an alternating pattern and torque them to manufacturer’s specifications.
36
Reattach the spring and rod to the governor arm.
37
Reposition the arm.
38
Pull the arm back and hold it while rotating the governor shaft clockwise until it stops.
39
You can now tighten the nut to secure.
40
Reinstall the governor spring by inserting one end into the appropriate hole in the governor arm and the opposite end into the mounting bracket.
41
Rotate the engine so the valve opening is facing upward then confirm that the piston is in the “up” position and that the flywheel magnets are aligned with the ignition coil.
42
Make sure the alignment marks on the timing cam are aligned with the front edge of the valve opening.
43
Once aligned, loop the belt onto the cam.
44
Use a razor to scrape off the old seal from the valve cover and cylinder head.
45
Clean the sealing surface.
46
Apply new sealant to the valve cover.
47
Make sure the flat side of the timing cam pin is facing upward then align the valve cover on the cylinder head and thread the bolts loosely.
48
Tighten the bolts in an alternating pattern and torque them to manufacturer’s specifications.
49
Replace the spark plug.
50
Be careful not to over tighten the plug.
51
Now reposition the engine on the mounting plate.
52
Insert the pump drive key into the crankshaft and lightly tap it into place.
53
Align the notch in the pump with the drive key and slide the pump onto the crankshaft.
54
Align the engine and pump with the bolt holes then reinsert the bolts and thread the nuts.
55
Once all the bolts are in place, torque the nuts to manufacturer’s specifications.
56
Reattach the detergent solution tube to the pump and remove the locking pliers.
57
Reconnect the high pressure hose.
58
Replace the engine cover and fuel tank.
59
Reconnect the fuel line to the fuel shut-off valve secure the retaining clamp and remove the locking pliers.
60
Reinstall the recoil starter by aligning it on the mounting posts then thread the nuts to secure.
61
Reattach the wire and boot to the spark plug.
62
Add fuel to the tank, replace the oil and confirm that the engine runs properly.
Description
This video provides step-by-step repair instructions for replacing the timing belt (or cogged belt) on a Honda small engine. The most common reasons for replacing the timing belt are when the engine won't run or runs poorly.
All of the information for this timing belt replacement video is applicable to the following brands:
Honda, Lawn Boy, Toro, MTD, Cub Cadet
Tools needed: 10mm socket and socket wrench, pinch off pliers, pliers, 12mm socket, flat blade screwdriver, 13/16 spark plug wrench, 10mm wrench, torque wrench, safety razor, needle nose pliers, ½ in wrench, Hondabond
All of the information for this timing belt replacement video is applicable to the following brands:
Honda, Lawn Boy, Toro, MTD, Cub Cadet
Tools needed: 10mm socket and socket wrench, pinch off pliers, pliers, 12mm socket, flat blade screwdriver, 13/16 spark plug wrench, 10mm wrench, torque wrench, safety razor, needle nose pliers, ½ in wrench, Hondabond
Step-By-Step Instructions
1
Before you replace the timing belt first make sure the engine has cooled.
2
Next, you should remove the wire and boot from the spark plug to prevent the engine from accidentally starting.
3
We recommend performing this procedure with no fuel in the tank and no oil in the engine.
4
Now remove the nuts securing the recoil starter to the engine and pull the starter off.
5
Use locking pliers to crimp the fuel line then release the retaining clamp and detach the fuel line from the shut-off valve.
6
You can now remove the engine cover and tank.
7
Disconnect the high pressure hose from the pump.
8
Use locking pliers to crimp the detergent solution tube and detach the tube from the chemical injector.
9
Now remove the nuts and bolts securing the engine and pump to the mounting plate.
10
Remove the pump.
11
Remove the pump drive key from the crankshaft.
12
Now carefully lift the engine off of the mounting plate and set it on a sturdy surface with the valve cover facing upward.
13
Use a 10mm socket to remove the bolts securing the valve cover.
14
Pry the cover off – be prepared for some oil to spill.
15
Use a socket or a spark plug wrench to help remove the spark plug.
16
Confirm that the piston is in the “up” position and that the flywheel magnets are aligned with the ignition coil.
17
Next, use a flathead screwdriver to slide the belt off of the timing cam.
18
Use a small flathead screwdriver to push out the pin securing the timing cam and remove the cam.
19
Now note the position of the governor spring in the governor arm then detach it from the arm and bracket.
20
Next, loosen the nut securing the governor arm and pull the arm free.
21
Detach the arm from the rod and spring.
22
Now rotate the engine so the crankshaft faces upward.
23
Remove the bolts securing the two halves of the engine housing together.
24
With the bolts removed, pry the engine housing apart.
25
This will require significant effort and you should be prepared for oil to spill.
26
If still intact, remove the old belt.
27
Use a razor to scrape off the old seal.
28
Clean the surface of both halves of the engine housing.
29
You’re now ready to install the new timing belt.
30
Loop the belt onto the crankshaft.
31
Make sure the belt is accessible through the valve opening insert the timing command secure it with the pin to hold the belt in place.
32
Apply sealant to the sealing surface of the engine housing.
33
Join the two halves of the housing together.
34
Secure the housing with the bolts.
35
Tighten the bolts in an alternating pattern and torque them to manufacturer’s specifications.
36
Reattach the spring and rod to the governor arm.
37
Reposition the arm.
38
Pull the arm back and hold it while rotating the governor shaft clockwise until it stops.
39
You can now tighten the nut to secure.
40
Reinstall the governor spring by inserting one end into the appropriate hole in the governor arm and the opposite end into the mounting bracket.
41
Rotate the engine so the valve opening is facing upward then confirm that the piston is in the “up” position and that the flywheel magnets are aligned with the ignition coil.
42
Make sure the alignment marks on the timing cam are aligned with the front edge of the valve opening.
43
Once aligned, loop the belt onto the cam.
44
Use a razor to scrape off the old seal from the valve cover and cylinder head.
45
Clean the sealing surface.
46
Apply new sealant to the valve cover.
47
Make sure the flat side of the timing cam pin is facing upward then align the valve cover on the cylinder head and thread the bolts loosely.
48
Tighten the bolts in an alternating pattern and torque them to manufacturer’s specifications.
49
Replace the spark plug.
50
Be careful not to over tighten the plug.
51
Now reposition the engine on the mounting plate.
52
Insert the pump drive key into the crankshaft and lightly tap it into place.
53
Align the notch in the pump with the drive key and slide the pump onto the crankshaft.
54
Align the engine and pump with the bolt holes then reinsert the bolts and thread the nuts.
55
Once all the bolts are in place, torque the nuts to manufacturer’s specifications.
56
Reattach the detergent solution tube to the pump and remove the locking pliers.
57
Reconnect the high pressure hose.
58
Replace the engine cover and fuel tank.
59
Reconnect the fuel line to the fuel shut-off valve secure the retaining clamp and remove the locking pliers.
60
Reinstall the recoil starter by aligning it on the mounting posts then thread the nuts to secure.
61
Reattach the wire and boot to the spark plug.
62
Add fuel to the tank, replace the oil and confirm that the engine runs properly.
Applicable Product Model
Parts Needed
Belt
$12.35



Total$0.00
Related Articles & Videos




Our Story
Family-owned and operated since 1912, Burke America Parts Group is the longest-running genuine appliance, HVAC, and outdoor power equipment parts solution in North America. At Repair Clinic, we're proud to be an international brand trusted by the pros as well as the DIY community.
About Repair Clinic
© 2026 RepairClinic.com