

Price Match Guarantee

In-stock parts ship the same day

365-Day Return Policy
Price Match GuaranteeGET PRO PRICING
Video & Articles: Appliance & Equipment RepairDryer Drum Not Turning? Replace Maytag Dryer Belt #Y312959

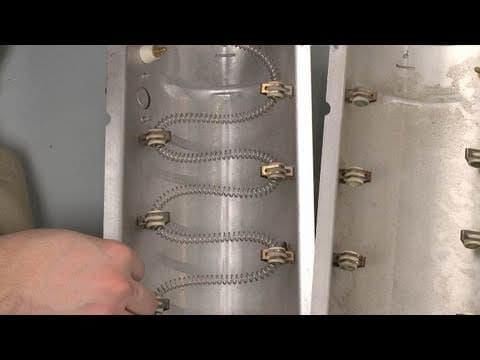
Dryer Drum Not Turning? Replace Maytag Dryer Belt #Y312959
Skill Level
Total Parts Cost
$29.50Estimated Savings
$112.5002:40
- Description
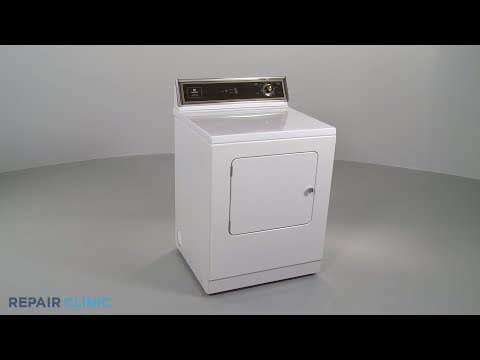
This video provides step-by-step repair instructions for replacing the belt on a Maytag dryer. The most common reasons for replacing the belt are when the dryer makes noise, won’t start, or won’t turn at all.
All of the information for this dryer belt replacement video is applicable to the following brands:
Maytag, Jenn Air
Tools needed: screwdriver
RepairClinic has millions of replacement parts for appliances, lawn equipment, power tools, and heating & cooling equipment including washers, dryers, dishwashers, refrigerators, lawn mowers, snowblowers, furnaces, and air conditioners. We guarantee the fastest shipping possible—all in-stock parts ship the same business day. Return any part for any reason with our generous 365-day return policy.
In addition to providing replacement parts, RepairClinic.com offers free online troubleshooting information and DIY repair videos. Use our website to choose from a series of problems to discover the likely causes and the correct replacement part(s) for your particular model. Once you’ve determined the solution, our expertly-produced video tutorials will guide you through every step of the repair.
At RepairClinic, we make fixing things easy!
All of the information for this dryer belt replacement video is applicable to the following brands:
Maytag, Jenn Air
Tools needed: screwdriver
RepairClinic has millions of replacement parts for appliances, lawn equipment, power tools, and heating & cooling equipment including washers, dryers, dishwashers, refrigerators, lawn mowers, snowblowers, furnaces, and air conditioners. We guarantee the fastest shipping possible—all in-stock parts ship the same business day. Return any part for any reason with our generous 365-day return policy.
In addition to providing replacement parts, RepairClinic.com offers free online troubleshooting information and DIY repair videos. Use our website to choose from a series of problems to discover the likely causes and the correct replacement part(s) for your particular model. Once you’ve determined the solution, our expertly-produced video tutorials will guide you through every step of the repair.
At RepairClinic, we make fixing things easy!
Step By Step Instructions
1
As with any repair, be sure you unplug the appliance before beginning.
2
Your first step is to remove the screws at the bottom of the front panel.
3
Now, rotate the panel out from the bottom to release the clips at the top.
4
Noting their location, disconnect the wires from the door switch as well as from the retaining clip on the panel and set the panel aside.
5
Release the wires from the front bulkhead.
6
Next, remove the screws to release the front bulkhead from the cabinet.
7
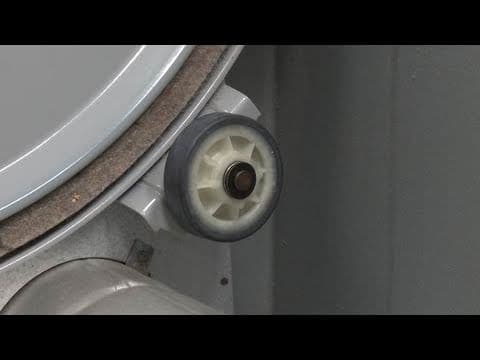
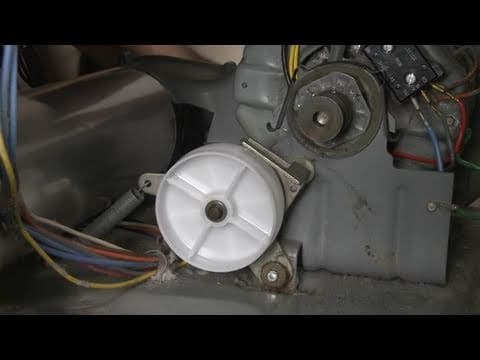
If the old belt is still intact, reach under the drum and push the idler pulley up to release the belt tension.
8
Unthread the old belt from the pulley and motor shaft and pull the belt out.
9
Install the new belt
10
By sliding it over the drum, flat-side down and loop the belt around the pulley and motor shaft in a zig-zag formation.
11
Now rotate the drum to help align the belt.
12
Position the front bulkhead and secure it with the screws.
13
Secure the door switch wires on the retaining clips of both the bulkhead and the front panel then reconnect the wires to the door switch.
14
Insert the front panel clips into the slots under the lip of the main top and rotate the panel into place.
15
Secure it with the mounting screws.
16
You’re now ready to plug the appliance back in to make sure it’s functioning properly.
Description
This video provides step-by-step repair instructions for replacing the belt on a Maytag dryer. The most common reasons for replacing the belt are when the dryer makes noise, won’t start, or won’t turn at all.
All of the information for this dryer belt replacement video is applicable to the following brands:
Maytag, Jenn Air
Tools needed: screwdriver
RepairClinic has millions of replacement parts for appliances, lawn equipment, power tools, and heating & cooling equipment including washers, dryers, dishwashers, refrigerators, lawn mowers, snowblowers, furnaces, and air conditioners. We guarantee the fastest shipping possible—all in-stock parts ship the same business day. Return any part for any reason with our generous 365-day return policy.
In addition to providing replacement parts, RepairClinic.com offers free online troubleshooting information and DIY repair videos. Use our website to choose from a series of problems to discover the likely causes and the correct replacement part(s) for your particular model. Once you’ve determined the solution, our expertly-produced video tutorials will guide you through every step of the repair.
At RepairClinic, we make fixing things easy!
All of the information for this dryer belt replacement video is applicable to the following brands:
Maytag, Jenn Air
Tools needed: screwdriver
RepairClinic has millions of replacement parts for appliances, lawn equipment, power tools, and heating & cooling equipment including washers, dryers, dishwashers, refrigerators, lawn mowers, snowblowers, furnaces, and air conditioners. We guarantee the fastest shipping possible—all in-stock parts ship the same business day. Return any part for any reason with our generous 365-day return policy.
In addition to providing replacement parts, RepairClinic.com offers free online troubleshooting information and DIY repair videos. Use our website to choose from a series of problems to discover the likely causes and the correct replacement part(s) for your particular model. Once you’ve determined the solution, our expertly-produced video tutorials will guide you through every step of the repair.
At RepairClinic, we make fixing things easy!
Step-By-Step Instructions
1
As with any repair, be sure you unplug the appliance before beginning.
2
Your first step is to remove the screws at the bottom of the front panel.
3
Now, rotate the panel out from the bottom to release the clips at the top.
4
Noting their location, disconnect the wires from the door switch as well as from the retaining clip on the panel and set the panel aside.
5
Release the wires from the front bulkhead.
6
Next, remove the screws to release the front bulkhead from the cabinet.
7
If the old belt is still intact, reach under the drum and push the idler pulley up to release the belt tension.
8
Unthread the old belt from the pulley and motor shaft and pull the belt out.
9
Install the new belt
10
By sliding it over the drum, flat-side down and loop the belt around the pulley and motor shaft in a zig-zag formation.
11
Now rotate the drum to help align the belt.
12
Position the front bulkhead and secure it with the screws.
13
Secure the door switch wires on the retaining clips of both the bulkhead and the front panel then reconnect the wires to the door switch.
14
Insert the front panel clips into the slots under the lip of the main top and rotate the panel into place.
15
Secure it with the mounting screws.
16
You’re now ready to plug the appliance back in to make sure it’s functioning properly.
Applicable Product Model
Related Articles & Videos




Our Story
Family-owned and operated since 1912, Burke America Parts Group is the longest-running genuine appliance, HVAC, and outdoor power equipment parts solution in North America. At Repair Clinic, we're proud to be an international brand trusted by the pros as well as the DIY community.
About Repair Clinic
© 2026 RepairClinic.com