

Price Match Guarantee

In-stock parts ship the same day

365-Day Return Policy
Price Match GuaranteeGET PRO PRICING
Video & Articles: Appliance & Equipment RepairWhirlpool Microwave Oven/Hood Combo High Voltage Capacitor Replacement W10561770 


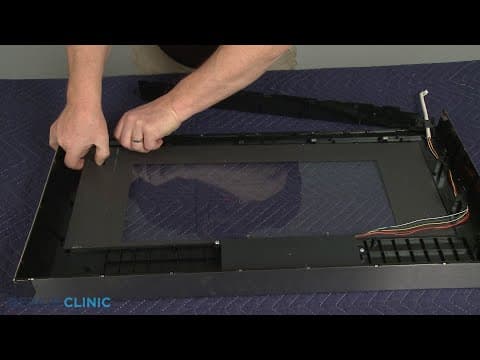
Whirlpool Microwave Oven/Hood Combo High Voltage Capacitor Replacement W10561770
Skill Level
Total Parts Cost
$47.27Estimated Savings
$112.5009:15
- Description
This video provides step-by-step repair instructions for replacing the high voltage capacitor on a Whirlpool microwave oven/hood combo (Model #WMH73521CS6). The most common reason for replacing this part is if the microwave will not work at all.
All of the information for this video is applicable to the following brands:
Whirlpool
All of the information for this video is applicable to the following brands:
Whirlpool
Step By Step Instructions
1
Whirlpool Microwave Oven/Hood Combo - WMH73521CS6
2
Microwave Oven High Voltage Capacitor Replacement
3
Tools needed: short Phillips-head screwdriver, screwdriver with insulated handle,
4
Because of the high voltage and high current used by microwave ovens, be aware that repairing this appliance poses a substantial risk for injury or death if precautions are not taken.
5
You should always unplug the microwave before you attempt any disassembly.
6
Since high voltage capacitors used in microwaves may retain a charge even after the microwave has been unplugged, we recommend that only experienced professionals access and replace internal components.
7
To replace the high voltage capacitor, you will need to uninstall the appliance.
8
Before you do this, remove the glass turntable and support.
9
Have an assistant support the microwave while you remove the mounting bolts from the upper cabinet.
10
Heavy
11
Carefully tilt the microwave down and pull the power cord through the hole in the cabinet.
12
Now, lift the microwave off the mounting plate.
13
Set the appliance down on its rear panel on a sturdy surface covered by a towel or blanket.
14
Use a Phillips-head screwdriver to unthread the screws securing the oven?s bottom panel.
15
Open the turntable motor terminal cover and disconnect the wires.
16
Unhook the wires from the retainer and disconnect the wire connecter to fully detach the bottom panel.
17
Return the microwave oven to its upright position and support it in the front.
18
Open the door and unthread the three screws securing the top grille.
19
Pull the grille down from the top to detach.
20
Next unthread all of the screws securing the rear of the cabinet.
21
Unthread the screws to release the blower cover or air damper
22
Now unthread the remaining screws on top.
23
Unthread the screw on the right side.
24
Heavy
25
You can now lift off the cabinet.
26
Shock Hazard
27
You should release the potentially stored electrical charge in the capacitor to avoid injury.
28
You can do this by placing a screwdriver with an insulated handle across each set of terminals.
29
Be very careful not to touch the screwdriver blade when doing this.
30
Note the orientation of the wires connected to the capacitor, then disconnect them.
31
Use a short Phillips-head screwdriver to unthread the screw securing the capacitor mounting bracket.
32
Slide the bracket down to remove.
33
Prepare the new high voltage capacitor for installation by transferring the mounting bracket from the old capacitor to the new one.
34
Now insert the bracket tab into the slot in the frame and thread the screw.
35
Connect the wires to the appropriate terminals.
36
Reposition the cabinet.
37
Thread the right side screw.
38
Reposition the blower cover or air damper and secure it with the screws.
39
Replace the remaining screws on top.
40
Thread the screws to secure the rear of the cabinet.
41
Reinstall the grill by aligning the tabs with the slots in the frame then snap the grille into position.
42
Rethread the three screws.
43
Having a magnetized screwdriver will make it easier to rethread the screw on the right.
44
Tip the appliance back.
45
Replace the bottom panel by first connecting the wire connecter and hooking the wires in the retainer.
46
Connect the motor wires to the terminals, then align the terminal cover and snap it closed.
47
Fully reposition the bottom panel and rethread the screws to secure.
48
Now carefully reposition the microwave on the mounting plate by hooking the back edge of the appliance on the tabs.
49
Insert the power cord through the hole in the upper cabinet.
50
Lift the microwave up and secure the mounting bolts.
51
Plug the power cord back in.
52
Replace the turntable and support and your microwave oven should be ready for use.
Description
This video provides step-by-step repair instructions for replacing the high voltage capacitor on a Whirlpool microwave oven/hood combo (Model #WMH73521CS6). The most common reason for replacing this part is if the microwave will not work at all.
All of the information for this video is applicable to the following brands:
Whirlpool
All of the information for this video is applicable to the following brands:
Whirlpool
Step-By-Step Instructions
1
Whirlpool Microwave Oven/Hood Combo - WMH73521CS6
2
Microwave Oven High Voltage Capacitor Replacement
3
Tools needed: short Phillips-head screwdriver, screwdriver with insulated handle,
4
Because of the high voltage and high current used by microwave ovens, be aware that repairing this appliance poses a substantial risk for injury or death if precautions are not taken.
5
You should always unplug the microwave before you attempt any disassembly.
6
Since high voltage capacitors used in microwaves may retain a charge even after the microwave has been unplugged, we recommend that only experienced professionals access and replace internal components.
7
To replace the high voltage capacitor, you will need to uninstall the appliance.
8
Before you do this, remove the glass turntable and support.
9
Have an assistant support the microwave while you remove the mounting bolts from the upper cabinet.
10
Heavy
11
Carefully tilt the microwave down and pull the power cord through the hole in the cabinet.
12
Now, lift the microwave off the mounting plate.
13
Set the appliance down on its rear panel on a sturdy surface covered by a towel or blanket.
14
Use a Phillips-head screwdriver to unthread the screws securing the oven?s bottom panel.
15
Open the turntable motor terminal cover and disconnect the wires.
16
Unhook the wires from the retainer and disconnect the wire connecter to fully detach the bottom panel.
17
Return the microwave oven to its upright position and support it in the front.
18
Open the door and unthread the three screws securing the top grille.
19
Pull the grille down from the top to detach.
20
Next unthread all of the screws securing the rear of the cabinet.
21
Unthread the screws to release the blower cover or air damper
22
Now unthread the remaining screws on top.
23
Unthread the screw on the right side.
24
Heavy
25
You can now lift off the cabinet.
26
Shock Hazard
27
You should release the potentially stored electrical charge in the capacitor to avoid injury.
28
You can do this by placing a screwdriver with an insulated handle across each set of terminals.
29
Be very careful not to touch the screwdriver blade when doing this.
30
Note the orientation of the wires connected to the capacitor, then disconnect them.
31
Use a short Phillips-head screwdriver to unthread the screw securing the capacitor mounting bracket.
32
Slide the bracket down to remove.
33
Prepare the new high voltage capacitor for installation by transferring the mounting bracket from the old capacitor to the new one.
34
Now insert the bracket tab into the slot in the frame and thread the screw.
35
Connect the wires to the appropriate terminals.
36
Reposition the cabinet.
37
Thread the right side screw.
38
Reposition the blower cover or air damper and secure it with the screws.
39
Replace the remaining screws on top.
40
Thread the screws to secure the rear of the cabinet.
41
Reinstall the grill by aligning the tabs with the slots in the frame then snap the grille into position.
42
Rethread the three screws.
43
Having a magnetized screwdriver will make it easier to rethread the screw on the right.
44
Tip the appliance back.
45
Replace the bottom panel by first connecting the wire connecter and hooking the wires in the retainer.
46
Connect the motor wires to the terminals, then align the terminal cover and snap it closed.
47
Fully reposition the bottom panel and rethread the screws to secure.
48
Now carefully reposition the microwave on the mounting plate by hooking the back edge of the appliance on the tabs.
49
Insert the power cord through the hole in the upper cabinet.
50
Lift the microwave up and secure the mounting bolts.
51
Plug the power cord back in.
52
Replace the turntable and support and your microwave oven should be ready for use.
Applicable Product Model
Parts Needed
High Voltage Capacitor
$47.27
Total$0.00
Related Articles & Videos
02:13
Part Replacement
Whirlpool Microwave Oven/Hood Combo Air Damper Installation W10843943
04:10
Part Replacement
Whirlpool Microwave Oven/Hood Combo Mounting Plate Replacement W11025649
02:58
Part Replacement
Whirlpool Microwave Oven/Hood Combo Control Board Assembly Replacement W10893407
02:37
Part Replacement
Whirlpool Microwave Oven/Hood Combo Line Fuse Replacement #W10138793
08:32
Part Replacement
Whirlpool Microwave Oven/Hood Combo Outer Door Glass Replacement WPW10478675




Our Story
Family-owned and operated since 1912, Burke America Parts Group is the longest-running genuine appliance, HVAC, and outdoor power equipment parts solution in North America. At Repair Clinic, we're proud to be an international brand trusted by the pros as well as the DIY community.
About Repair Clinic
© 2026 RepairClinic.com